*THIS BLOG IS NO LONGER UPDATED*

My new website can be found at http://www.quernuscrafts.co.uk/

Tall and Small Purple Millefiori Cats (b.31 August 2009)

I made a collection of six Millefiori Cats after wanting to experiment more with flower canes, having still had a hankering to create a flowery cat! For the cane, I used a pink log for the centre, then five petals of purple clay, each with an outer layer of white.

Then I used a pearl lilac clay to fill the space between the petals, and as an outer border. This made the flowers appear standalone. I then reduced the cane down to three different sizes.

For the first pair of cats (top right), I applied thin slices of the single flower cane to the clay core and then blended them in afterwards. This had the result of increasing the size of each flower to 7-8mm in diameter. The Short Cat as a bit of a floppy ear, which gives hima rather soulful look!

For the second cats (left), I used the pearl lilac clay for the core and inlaid single smaller flowers and blended them with the core. Having the core and the background to the flower cane the same colour allows the flowers to appear defined by their petals. The inlay method worked well as I was able to blend the background colour with the core clay, making the flowers almost seemless. The flowers have a diameter of 5-6mm.

For the third cats (bottom right), I had reduced the large flower cane and cut it into seven segments, and then put those segments together to create a new flower and reduced that cane down further. This resulted in each individual flower measuring about 2-3mm, and gives the more classical millefiori effect.

The Tall Cats stand about 5.5cm tall and 2.5cm wide, and the Short Cats are just under 4cm tall and 2.7cm wide. They are listed for sale my shops at Folksy.com and Etsy.com.

Tall Rainbow Cat (b.31 August 2009)

I had a busy day on Monday! I made my first Tall Rainbow Cat using a lovely blend of red, deep red and deep pink, and I'm pleased with the way this kitten has turned out. He stands just over 4.5cm tall and goes very well with Small Strawberry Rainbow Cat.
It's interesting to see how the shape of the Tall Cats is changing subtly as I make them. My first Tall Cat was Tall Purple Millefiori Cat which has a more rounded aspect - a bit chubbier round the face. I love how each Cat turns out to have his own personality!

Bunny and Wee Bunny (b.31 August 2009)

I started playing around with bunnies in the morning, as it's been a long time since I last attempted one, and I've been wanting to have another go for a while. The large bunny measures 3cm wide and 3.5cm tall (to the tips of his ears). He works better having some paws, and has a certain cuteness to him.
Wee Bunny was a bit of fun using the clay left over from the larger bunny. As a result, he's a diminutive 2cm wide and 2.5cm to his ear tips. I didn't have beads small enough for his eyes, so these are made out of dots of black polymer clay. I will work on a range of colours of these Bunnies as I approach my first craft fair (more news on that shortly!)

Flower and Star Card Toppers (31 August 2009)

I made this flower card topper for my friend Nicola's birthday. I love the bright colours, and using a thin log as a frame (with mitres) helps to set it off very well.
The star card toppers were made from the scrap clay from the canes used for the Purple Millefiori Cats. Again, using a contrasting frame really helps to bring it together, and I will now try this technique with some of the abstract panels I've designed.
We visited the Paper Mill Shop in Burneside near Kendal a few days ago, and I stocked up on a great range of A5 colourful cards. I am planning to design a range of handmade cards with polymer clay toppings, in A7 and A6 sizes. My preference is very much for simple cards without much frippery, so that's what I'll be making!

Quernus Crafts now on Etsy.com!

I've now set up a shop on Etsy.com - just click on the logo to find me there! I've spent a fun morning stocking my shop up, although I do think for those in the UK that it'll be a bit easier to use my Folksy.com shop. Still, always good to have a foot on either side of the Pond!

The web address of my Etsy.com shop is http://www.quernuscrafts.etsy.com/, and remember to also check out my Folksy.com shop at www.folksy.com/shops/QuernusCrafts.

I'd appreciate your help in spreading the word about my shops - Christmas is coming and I might just have the perfect Christmas gift for you!

Small Strawberry Rainbow Cat (b.29 August 2009)

What colour do I describe this little kitten as? I really have no idea! On a whim, I decided to mix red, pink and luminous pink clay (the same colour as I used to make the very first Rainbow Cat), and this wonderfully, rich, vibrant pinky-red colour was the result.

He reminds me of some sort of exotic drink, like a strawberry daiquiri!

He stands a little over 3cm tall, and is 2.5cm at his widest point. A coat of satin varnish really brings out the vibrant colours.
You can find this cat on sale at my Folksy.com shop - click here for more info.

Tall Love Cat & Tall Spotty Cat (b.29 August 2009)

I had a lot of fun making these two elegant cats - they measure 5cm tall and 2cm wide. My cats just seem to be getting taller!

I love the striking colours, and having hearts and dots inlaid into the clay makes sure that they don't take themselves too seriously! I'm much happier with these Spotty Cats than my first attempts - I rolled out the clay for the dots much thinner than I did before, which meant I could press them into the clay with very little distortion.

I finished off the cats with a coat of satin varnish - it really does bring out their natural elegance and charm!

Both cats are available for sale at my Folksy.com shop - click here for more information.

Tall Spotty Cat and Small Spotty Cat (b.28 August 2009)

After spending most of Thursday exploring Folksy.com (and lovingly fussing over my shop like a mother hen!), I got up at 7am on Saturday to get down to some proper crafting. I made this pair of Spotty Cats as a present for my good friend Jo's 30th birthday.

The tall cat is pretty large by my standards - he's 6cm tall and 2.5cm wide. The small cat is 3.5cm tall and 3cm wide (he's rather chubby!)

I used a sapphire Fimo Effect clay for the tall cat, and a deep fuschia for the small one. After making the body, I rolled out a thin sheet of the fuschia clay and cut out over 30 small circles. I applied these carefully to the body and then rolled it to make sure the circles were all properly incorporated and bedded in. I repeated the process in reverse with the small cat, and once they were baked, I applied a coat of satin varnish. This really brings out the metallic sheen of the blue clay, and adds an extra layer of protection.

30th Birthday Card Topper (28 August 2009)

This is the card I made for my friend Jo. I had some scrap clay left over from the Spotty Cats, so I used the metallic blue as a background, and then twisted the pink and the blue together into a stripey snake log. Once the log was thin enough, I made the number 30 out of it, and also cut out some tiny hearts from mixed pink and blue clay using a small cutter.

I then applied a border round the panel using the the rest of the stripey log, and used mitre cuts to get the corners right. A coat of satin varnish followed, and then I mounted the panel onto matching blue card, and stuck the resultant larger panel into a square aperture card using double sided sticky tape.

The panel measures 4.5cm wide x 4cm high.

Quernus Crafts now at Folksy.com!

Folksy

Just to let you know I've opened up a store on Folksy.com, the UK equivalent of Etsy.com where handmade craft and art items are sold under one roof. I am in the process of 'stocking up' the store, so there are only a few things listed so far. But please spread the word and keep visiting for all the latest things I'm selling.
You can find my shop at http://www.folksy.com/shops/QuernusCrafts.

I am also working on my Etsy.com shop, so watch this space for updates on progress there.

Piglings (b.26 August 2009)

After what seems like ages, I made some more Piglings last night. It was a bit like coming home - I loved working with their expressions (and each one IS different), and also making a clear distinction between large and small. I'm happy with the way these have turned out, and they are very quick to make.

The large piglings measure 3cm wide by 2.5cm tall, and I use the 4mm obsidian beads for eyes. The small piglings are 2.5cm wide by 2cm tall, with 3mm black onyx beads.
Piglings are now on sale at my Folksy shop - click here for more information.

Tall Spotty Cat (b.26 August 2009)

After experimenting with rolling cut out shapes onto the clay body, I tried the true inlay method, where I cut out the shape I was going to insert, cleared out all the clay, and then placed the new shape to match. This was painstaking work, hence the rather small number of hearts on this cat (also 4.5cm tall). I also inserted a pink heart in each ear, although it's a little hard to see this in the photograph.


It's easier to see the inlaid ears in the photograph from the back.

Tall Spotty Cat (b.26 August 2009

Instead of using the millefiori technique, with this cat I used an inlay technique. After forming the body, I pressed on tiny cut out hearts in pale pink (pigling colour, in fact). Then I rolled the body to incorporate the hearts. As a result, the hearts got quite distorted, but the end result is quite fun. He stands about 4.5cm tall.

It's fun to chart the progress of how these cats have developed, from the original squat, conical shape to this more stylised shape. I'm sure many more cats are just waiting to be made!

Small Raspberry Rainbow Cat (b.25 August 2009)

This little kitten, measuring about 3cm tall, was made by mixing a number of different shades of pinks, reds, purples with a dash of white. The resulting marble effect is rather fun! I'm getting quicker at putting together the cats, and I'm working on a number of different shapes and sizes which should go down well.

As I was reminded today, Christmas will soon be upon us and I will think about developing a Christmas range.

This Rainbow Cat is now on sale at my Folksy.com shop - click here for further details.

Small Green Rainbow Cat (b.25 August 2009)

With the scrap clay from the green landscapes, I quickly made up a small stripey green rainbow cat. He's a bit lop-sided, but that just adds to his character! I love the patterns made by mixing the clay colours, and I kept on mixing the colours here to get a very fine stripe.

The permutations are endless, and every cat is completely unique as a result.
This kitten stands about 3cm tall.
This Rainbow Cat is now on sale at my Folksy.com shop - click here for more info.

Green Landscapes (25 August 2009)

(4cm x 4cm, 4cm x 2cm) I've spent a lot of time working in reds, purples and blues, and whilst I love these rich colours, I felt the need to try something new yesterday. And so I mixed up four different shades of green and blended them together. I love three dimensional effects that can be achieved by using distinct shades, and I am looking forward to experimenting more with these.


(4cm diameter) The green moon disc worked out very well, and the shapes lent themselves very well to a round shape. These designs would work very well set in jewellery, as well as card toppers, and varnishing will help give them extra depth. I also want to experiment with translucent clay, as the effects from this can be rather interesting.

Red Landscapes (25 August 2009)

(Each 4cm x 4cm) With the scrap clay left over from the rose cat, I experimented with creating marbled abstract landscapes. I'm pleased with how these have turned out, although the colours are perhaps a bit too close in shade to create a really powerful image.

I am keen to use these as card toppers, but I think they need to be framed in some way to be efective. Putting them in aperture cards would work best, perhaps with a constrasting card frame, so it looks like a miniature picture.

Tall Rose Millefiori Cat (b.25 August 2009)

I woke up yesterday working out in my head how to create a white cat covered in roses, as there's something very appealing about the idea. So I set out creating a rose cane, which I did by layering dark red, red, and pink in alternate layers, then rolling it up into a jelly roll cane, and adding a length of green clay as the leaf. The cane was finished off with a thin sheet of white clay as a border.

I then reduced that cane and cut it into five equal lengths to create a 'bouquet' of roses, and then reduced that down. Overall, I think the roses are a bit on the small side, and then tend took a bit more like strawberries! Next time, I'll make the roses a little bigger, with more space between them. I think I will aim for a simpler rose shape as well - the jelly roll method worked to a certain extent, but turned out to be a bit fussy.
This cat is one of my taller creations and measures nearly 5cm.

Tall Purple Millefiori Cat (b.25 August 2009)

After a weekend away with no outlet for craftiness, I pretty much spent the whole of yesterday sat at the dining room table coming up with lots more cats.

I wanted to continue experimenting with using cane slices, and for this cat (which stands just over 4cm tall), I used reduced slices of the cane I had used for this earlier Millefiori Cat. I reduce the main cane down to a long, thin cane, then cut that into seven lengths and placed them together into a flower formation. A thin sheet of purple clay round the perimeter formed the border, and I reduced down the resultant cane. I'm always amazed at how much detail is preserved even when the pattern hasbeen shrunk down so much.
I'm not sure why this cat is tall - he just came out that way. However, I do like having a range of cat shapes, so I'll play with that some more.
This cat is now for sale at my Folksy.com shop - click here for more info.

Small Black and White Rainbow Cat (b.20 August 2009)

I had some scrap clay after cutting the chequer board canes, and so I decided to use that to create a stripey black and white cat. I think the stripes have worked out pretty well here, although once again I forgot to put whisker and paw markings on.

I'd welcome any thoughts on whether the cats look better with or without markings.
I will experiment with different ways of creating stripes - although it is basically a random process, there are ways of guiding the stripes to a certain extent, and with this Cat, the effect is very different from the ginger Rainbow Cat. In this case, I used long, thin strips of colour and rolled them up into a ball. With the ginger cat, I twisted together two ropes of clay, repeated the process a couple of times, and then rolled the resultant snake into a ball-shape.

Small Chequered Millefiori Cat (b.20 August 2009)

Having stayed up till 11.30pm playing around with colours and cats, I woke up this morning wanting to try out something new. And here it is! Creating the chequered pattern was fairly easy - I rolled out two sheets of white and black clay, put them on top of each other, cut them in half longways, and stacked one half on top of the other half.

This created alternative stripes. I then cut long strips from the stack and created a chequer board effect by stacking the strips on top of each other and side by side, alternating the white and black squares. I ended up with a cane with 4x4 alternating black and white squares. I didn't need to reduce the cane at all, and simply cut thin slices from the cane and pressed them to a core of scrap clay. Ears, face and tail were applied as usual. (I forgot to put whisker and claw marks on the cheeks and paws this time - I guess it's good to have alternatives, but on balance I prefer having the markings.)

Small Purple Millefiori Cat (b.19 August 2009)

I had another go at making a cane last night to use as a veneer for another Rainbow Cat. I went for a pansy-type flower, with a fuschia core, and alternating purple and lilac petals.

I then used a thin sheet of deep purple clay as a border and reduced the cane down. The resulting cane slices are rather nice, I think, although it would also work with smaller flowers, given the size of the Cat.

One option is to cut the cane into small sections and gather those together to make a larger cane. Reducing that cane then results in clusters of smaller flowers. I attempted this in the first cane I made, which I used to cover the first Millefiori Cat.
By having smaller flowers within a larger cane slice, this may make it easier to cover the clay core. Once the slices are applied, it's important to blend them carefully into each other so there are no gaps, and it looks like one continuous surface. I will experiment with varnishing the Cats and see whether that helps.
This cat is now for sale on my Folksy.com shop - click here for more info.

Small Orange Rainbow Cat (b.19 August 2009)

Inspired by the purple and pink marble effect Rainbow Cat, I tried going for a more traditional colour - a ginger cat. Again, I'm pleased with the way he's turned out, and the stripes are just wild.

The trick is to know when to stop mixing the colours before molding them to the shape of the cat's body. But then again, whatever you end up with will be interesting!
This Rainbow Cat is now on sale at my Folksy.com shop - click here for more info.

Small Millefiori Cat (b.19 August 2009)

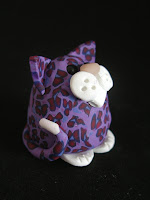
This wee mite is a little smaller than the rest, standing at 2.5cm tall. Here I covered a core of scrap clay with thin slices of a millefiori cane I made a couple of weeks ago.

The cane is made up of a blue core, surrounded by three 'petals' of red/blue Skinner blend (where you create a graduated colour sheet from repeatedly rolling two or more triangles of clay through a pasta machine) rolled into bullseye canes. Then I added purple rolls to surround the pattern, and reduced the cane down several times so the resulting pattern was small and delicate. I made the ears and tail from thicker slices of the cane, and you can see how the pattern extends through the full thickness of each slice.

I think this looks a bit like a leopard print, which is quite appropriate for a cat!

Small Purple Rainbow Cat (b.19 August 2009)

I love what you can do with polymer clay! The marbled effect I achieved by simply mixing two different colours is great - and no two patterns are ever the same.

Here I used a deep purple and fuschia, and although this created a lovely subtle effect, I will experiment with more contrasting colours next time. He stands about 3cm tall with 3mm black onyx beads for eyes.

Experimenting with marbling colours reminded me of something I've been thinking of for a while - creating a patterned cat by covering a clay core with millefiori panels.

Small Rainbow Cats (b.19 August 2009)

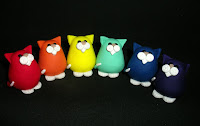
Yesterday was Rainbow Cat day. I had lots of fun with these little guys! I had had this pictue in my mind of having rainbow coloured cats all lined up in a row, and this is the result! They each measure about 3cm tall.

I experimented with the size of the face, having used a larger size for my first pink attempt. However, I think the smaller size works a little better, although there's something to be said for creating different experiences using different sizes and facial elements. Again, I've used the 3mm black onyx round beads for the eyes, and I love the clean result compared with the plastic beads.
These Rainbow Cats are now on sale at my Folksy.com shop - click here for more info!

Small Pink Rainbow Cat (b.13 August 2009)

This is the first of a range of colourful kittens, inspired by Greg's request for a luminous pink cat. I'm pleased with the way this kitten has turned out, so watch this space for the full range!

He stands about 3cm tall, and I have used 4mm black obsidian round beads for his eyes - they give a much cleaner shape than the plastic beads I have been using up until now.

Wee Sheep (b.13 August 2009)

I made this Wee Sheep using the same technique as the Wee Highland Cow, and I'm pleased with the result. Attaching the head and ears to the body before applying the clay strands helps to incorporate the shape much better.

Having a full fringe of hair is a new departure for me, and I'd like to try making other breeds of sheep now, to see how easy it is to make the distinction.
Wee Sheep is now on sale at my Folksy.com shop - click here for more info.

Shaggy Dog and Wee Shaggy Dog (b.13 August 2009)


These dogs are based on a design I first made back in 2001. I made the small dog first, based on the round shapes I'm making for the Wee Beastie range.

I extruded three different colours of clay - white, dolphin gray and a darker gray - and then applied each strand to a white clay base. Quite time consuming. Next time, I will experiment with creating more of a distinct fringe for the eyes and the muzzle, which should help define the face more.

With some scrap clay, I made the body for the larger dog and repeated the process as I had lots of clay strands left. The small dog is 2.5cm tall, and the large dog is 5cm tall. I'm keen to try more breeds of dog, and will work on a labrador next. A dalmation would also be quite distinctive, and I just have to try a Schnauzer!

Wire Tree (12 August 2009)

So I followed an urge yesterday and starting playing around with the florists' wire I had picked up from Craftwise in town the day before. I spent a number of hours trying things out (including soldering - more practice needed there, methinks), and ended up with this.

I have been wanting to make a tree for some time now, although my initial thought was to make it with polymer clay. I cut equal lengths of the wire, 16 in all, and then used jewellers' pliers to curl each end. I then bound all the wires together using a high gauge black wire, and arranged the branches to create an abstract tree shape. I twisted two or three of the roots together to create a stand. Whilst the tree looked good just like that, I felt it needed something more, and after a false start with some dyed moss (the kind you use for model railway landscapes), I ended up making leaves out of beads.
I threaded two different shades of green seed beads on very fine gauge gold wire. Then I wound the 'stem' of each leaf onto the curled tip of each branch, putting two leaves on a few of them. There are 20 leaves in total. I then added three 'apples' by using red wooden beads. It was quite fiddly to do, and next time Iwill experiment with attaching the leaves and fruits before binding the wires together.
The tree itself stands approximately 12cms tall, and about 10cm wide.

Wee Highland Cow (b.6 August 2009)

This wee beastie measures 3cm from horn tip to horn tip (2cm across the base). This is only my second attempt at an Aberdeen Angus (thanks to Sheila for reminding me of the proper name!), and it was much easier this time around.

I used the same colour clay (terracotta) for the body as for the hair, and thicker extruded clay, so it didn't take so long to put on. I also attached the face and horns before starting on the hair, and that has resulted in a more integrated feel. I've also made the horns more exaggerated, which again helps to balance the overall shape. The next job will be to make a Wee Sheep using the same sort of approach.
Wee Highland Cow is now on sale at my Folksy.com shop - click here for more info.

More Piglings (b. 6 August 2009)


I was in town on Tuesday and bought a 350g bar of Fimo Soft in flesh pink (#43). I really hadn't been convinced by the colour (or consistency) of the SuperSculpey - it really ended up a bit dark for the piglings.

But I knew as soon as I saw the large bar of Fimo that this was just the right colour. I'm delighted with the way these have turned out.

I tried a couple of different variations, and the pigling on the far right has 4mm black bead eyes, rather than the usual 3mm (close up of this pigling in this photo). I managed to line up the nostrils with the eyes with the ears, quite by accident, and I think this has resulted in the best facial layout I've found so far. This pigling measures about 3cm (just over an inch) from ear tip to ear tip, and the smaller version is about 2.5cm. I think making more of a distinction between the two sizes will work better.

And this is the Ascent of the Piglings! Going from left to right, it shows my first effort and all subsequent experiments using different clays. I am sure my experiments will continue, but I think I've finally hit on the shape, colour and composition that I like best.

Abstract Purple Landscape (6 August 2009)

(6cm x 6cm) I mounted this abstract panel (which bears a passing resemblance to Munch's The Scream) in a triple fold aperture card for my cousin Hannah's wedding. The original plan was to use one of the purple landscape panels, but this turned out so well that I decided to use this.

Once I had selected all the useful bits for the other panels (see below), I gathered up the scrap clay and pressed it together. Then on a whim I decided to see what would happen if I rolled out the scrap clay, and this was the amazing result! The actual rolled out panel was quite large (at least twice the size it is now), and so I used the aperture to select the best pattern and trimmed a square to fit the card aperture. After 4 coats of matt varnish, the piece was finished and I stuck it into the aperture using double sided sticky tape. Although the panel is quite large, because it is only 1-2mm thick, it is relatively light and works well in a card. I will be working more with this technique in the very near future.

Purple Moonscapes Nos 1, 2 & 3 (6 August 2009)

No 1 (5cm x 2cm) After the initial landscape attempts, I had lots of wonderful snippets of interesting patterns left over. I spent about 2 hours experimenting with different effects, and then three panels looked as though they were moonscapes as highlights of colour appeared.

So I added a tiny ball of pale clay and rolled it out as carefully as possible, to avoid distortion of the circle. These will make great card toppers or small pictures - with this technique, I have managed to create a painted effect similar to encaustic art which I just love.

No 2 (2.5cm x 2.5cm) This nearly didn't make it as a finished panel because the disc became very distorted when I rolled it out. By this time, the clay was over-conditioned, and on a number of occasions I had to put the clay in the fridge to cool it down. Here, I pulled the edges of the panel to correct the distortion, and at the last minute I decided to bake it and see how it turned out. I rather like the effect of not having completely square edges.

No 3 (3.5cm x 1.7cm) By this time, the useable panels were getting smaller and smaller, but I wanted to experiment with putting tree shapes into the landscape. Here, I added a couple of tiny strands of scrap clay, one of which was slightly twisted, and then hand rolled them lightly into the panel. I think the effect is a little chunky for the size of panel, and I'm working on ways to incorporate inclusions to suggest detailed and delicate landscape features.