

Wee Bunnies - A Retrospective

21 December 2010
It's been such a long time since I wrote about bunnies, that I thought it was about time for an update. Things have moved on quite a bit since I came up with my first bunny design way back in July last year - so without sparing a thought for my blushes over my early work, here is the Evolution of the Quernus Bunnies.
Alonso the Armadillo (b.5 August 2010)

16 December 2010
Meet Alonso, the Christmas Armadillo! Well, OK, p'raps not, but I promise there will be a Christmas Armadillo next year :)
Micicles!

2 December 2010
Some of you might have noticed that we've been having a bit of snow lately. Well, the mice haven't seen snow before, so here's the story of one Wee Santa Mouse, called Wee Mousie, who decided to brave the wintry weather and venture outside...
The Mouse Nativity Part 2 (23 November 2010)

25 November 2010
To follow up on my last post, I am delighted to show you the beautiful stable that a good friend of mine, Glenda, has made for the Mouse Nativity! It's just incredible - so much attention to detail, and so utterly perfect! She's going to make these as part of the Mouse Nativity set which will go on sale early next year, and will be sold a piece per month so you can collect the set in time for Christmas!
The Mouse Nativity (11/12 November 2010)
 |
| The Mouse Nativity |
First of all, I want to say a huge thank you to Ruth, a lovely lady I recently met on Flickr after being introduced by another lovely lady, Janet, who I met at the Saltaire Makers' Fair in September (don't you just love the internet?!) It turns out that Ruth is a great fan of my wee mice, and after some creative exchanges, I went off and came up with The Mouse Nativity!
Trevor the Snail (b.28 July 2010)
 |
| Trevor the Snail |
It's been a while since we've had a Snail guest-starring on the website, and so I thought now would be a good time to introduce Trevor.
Of Mice and Treats

4 November 2010
I've been busy with Wee Mice of late. I first made them back in May, which is scarily about six months ago. I'd been wanting to make Wee Mice for a while, and that was the time they decided to appear! These wee cuties are pretty small - the stargazing ones are about 2.5cm (1") tall, and the sugarmouse ones are about the same size in length. They come in all sorts of colours (white, gray, fawn, brown, dark brown), but what I have been enjoying most of all has been making up wee treats for them!
Halloween Special
 |
| Three Witch Cats |
24 October 2010
As it's not too long till Halloween, I thought it would be an appropriate time to take a look at my scary Halloween range of wee creatures. Actually, they're not scary at all - even the ones I tried to make a little bit scary still ended up looking pretty cute :)
As it's not too long till Halloween, I thought it would be an appropriate time to take a look at my scary Halloween range of wee creatures. Actually, they're not scary at all - even the ones I tried to make a little bit scary still ended up looking pretty cute :)
Toucan Brooch (b.25 April 2010) and other jewellery
 |
| Toucan Brooch |
I have so many draft posts waiting to be written (72 at the last count) about what I've been making over the past six months, that I've decided to have a different approach. I'm now going to dip in and out of these draft posts and pick ones at random, rather than go in strict chronological order.
So I'd like to introduce you to a Toucan Brooch I made up back in April this year. I was at the Keighley Sheep Fair (very cute lambs were in evidence that day) and about 10 minutes before the end of the market, a lady come up to me and asked with a note of desperation in her voice whether I had any toucans for sale. At that time, I didn't, and in fact, I still don't have any toucans, but I said I could make up a brooch for her and drop it off to her when I was next in Skipton.
Wee Belle (b.27 May 2010)
 |
| Wee Belle |
The Big Green Festival, Beningborough Hall, York - 25 & 26 September 2010
 |
| Beningborough Hall and Gardens, York |
Quernus and the Snails are taking part in the National Trust's Big Green Festival at Beningborough Hall and Gardens, near York this weekend. It sounds as though it will be a great weekend out if you're over in that neck of the woods - it's a celebration of all things green for greener living.
Here's a sneak preview of some of the new wee creatures that will be on sale this weekend.
Saltaire Arts Trail - Makers' Fair 11 & 12 September 2010

Quernus and the Snails will be at the Makers' Fair at Victoria Hall in Saltaire this weekend! I have to say I'm really looking forward to it - it's been over a month since I last did a craft fair, and I've been busy making up new stock, dreaming up new designs, as well as working on commissions.
Here's a sneak preview of some of the set pieces I will be unveiling at this event, along with the usual suspects of Moles, Wee Sheep, Wee Highland Cows, Rainbow Cats, and many more!
 |
| Sergeant Pepper Cats |
 |
| Hilda, Esmerelda and Freda |
 |
| Garden of Eden Cats |
 |
| Braveheart Cat |
 |
| Four Seasons Cats |
 |
| Snail Lulu |
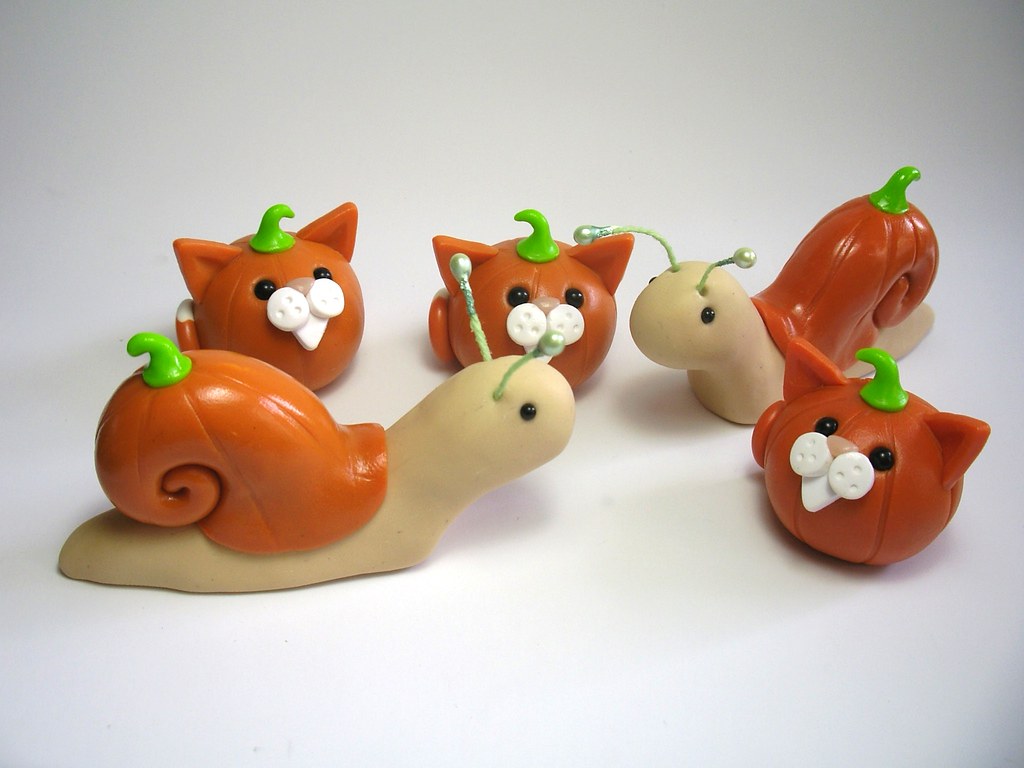 |
| Wee Pumpkin Cats and Snails |
 |
| Ariadne and Phaidra |
 |
| Alphabet Cats |
 |
| Piglings! |
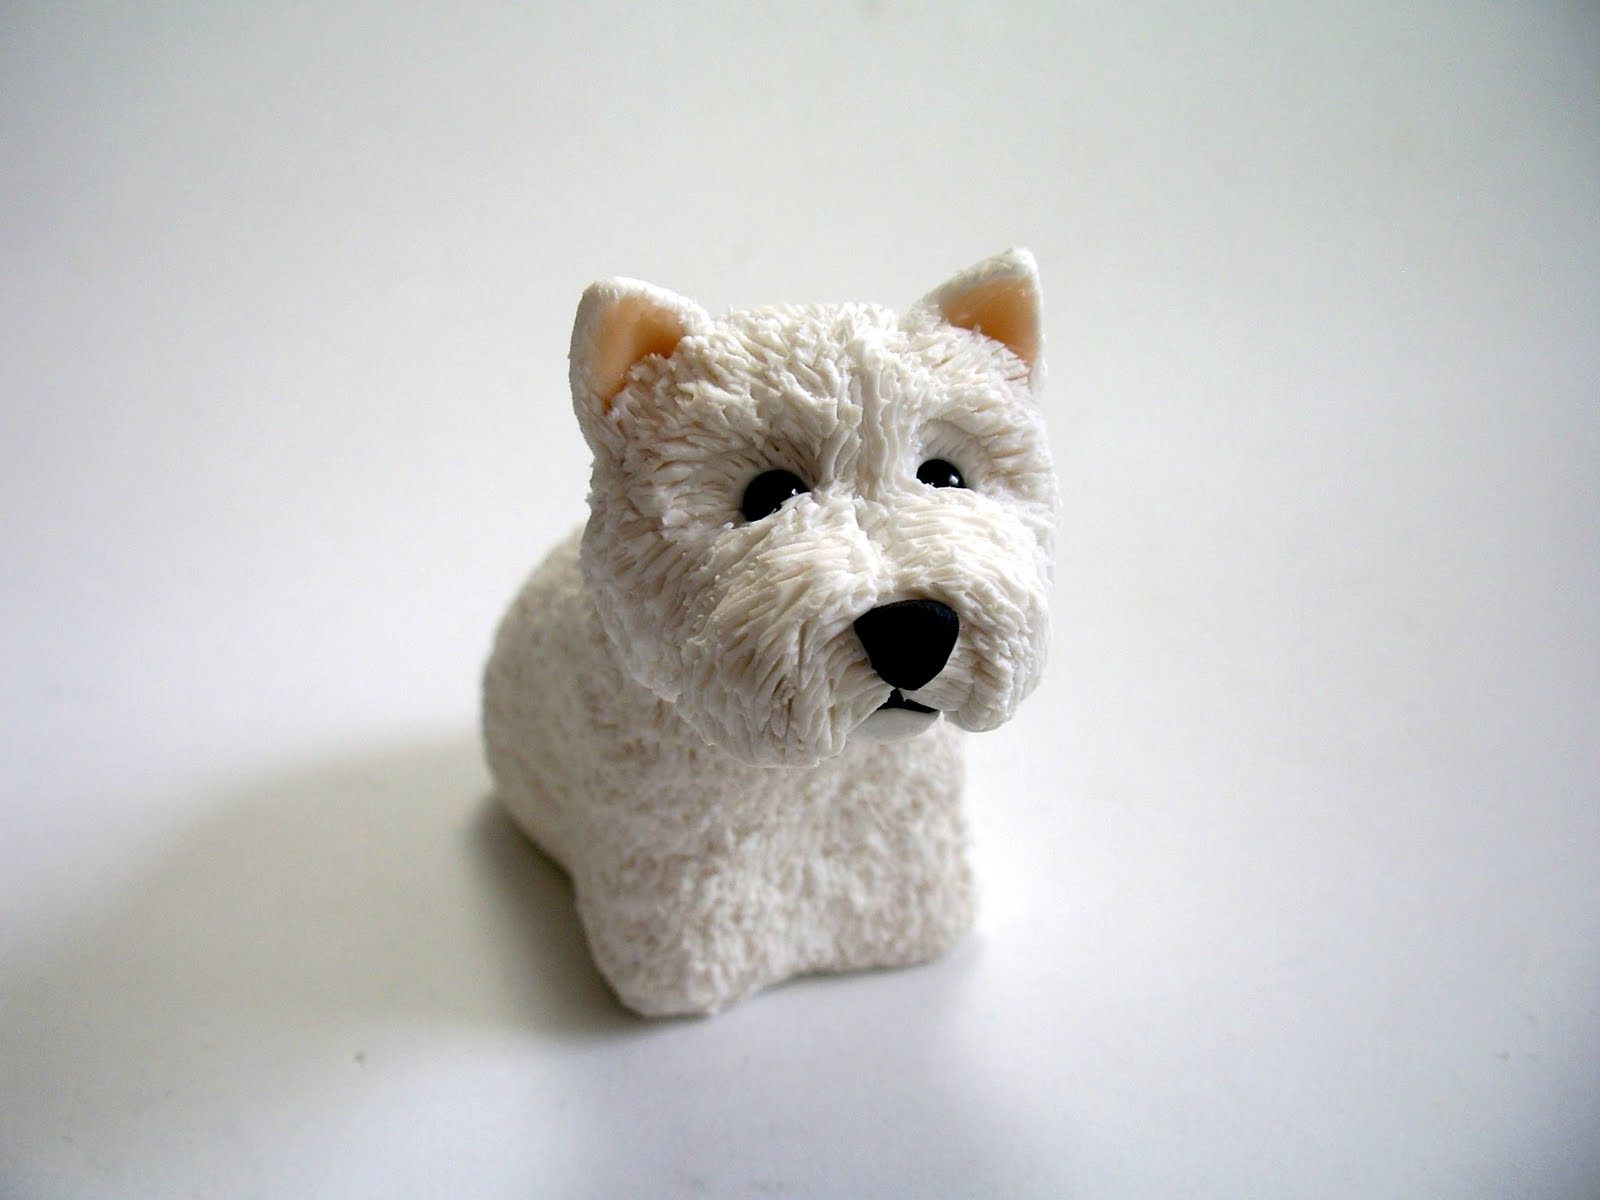
Wee Holly (b.13 May 2010)

Meet Wee Holly. She's one of my favourite wee dog commissions, and I have Steph Keegan to thank for this. Holly (aka Big Mama) has been a dear friend and companion to Steph for many years, and she wanted a little keepsake of her.
Blossom Cats (b.5 June 2010)
 |
| Blossom Cats |
Flower Cats (b.11 May 2010)
 |
| Flower Cats |
I wasn't sure whether to keep the body colour the same as the flower centre this time, and so I decided to make them a little differently. Using green as the body colour helps to make them look more like flower cat sprites, than cats in fancy dress (at least, that's what I think!)
 |
| Sunflower Cat |
 |
| Rose Cat |
I'm keen to experiment with other types of Flower Cats - not quite sure how I'll do a Foxglove Cat, but I'm happy to give it a go!
The Birthday Party (b.11 May 2010)
 |
| The Birthday Party |
I started out with the idea of having a cat in a party hat - and a fancy one at that, with stripes, a fluffy rim, streamers and a green bobble on top! And then I decided that he needed a party whistle, which I made from some of the striped clay with a short length of wire inside to keep it strong.
After that, it became obvious that the cat couldn't celebrate my birthday on his own - so I made him a wee friend, also with a party hat. And then they got hungry, so I made a birthday cake with a candle in it, and I gave them each a slice on small paper plates. You can tell I had quite a lot of fun :)
The Birthday Party has now taken up residence with Gemma, along with a number of my other wee creations, to celebrate her birthday. I love that kind of circularity!

Fireman Cat (b.10 May 2010)

I seem to be on a bit of an occupation theme here :) Fireman Cat came about when I was at the Ilkley Arts Market on 8 May. A lovely woman called Hilary asked if it would be possible for me to make a Fireman Cat for her friend, and straight away I could picture how he would look.
When I got back home, I did a bit of research as to what a fireman's outfit looks like these days. They've done away with the traditional outfit and now I think they look more like policemen with bigger helmets. So I decided to stick with Fireman Sam as my inspiration for the design.

For his axe, I used a millefiori cane to create the wood effect, and then made up the head using metallic red clay, with a silver tip.

I used silver clay blobs for the shiny buttons, and for his helmet badge. The important thing with making accessories for the cats, I've found, is not to skimp on proportions. Go large. I applied this principle to Police Mole, and now to Fireman Cat. As a result, their helmets actually do look as though they fit them properly, and aren't just a blob of clay balanced on top of their heads. It's a fine balance to achieve, but it's worth the extra effort, as it helps the design to gel together more and look more cohesive.

Another thing I've noticed looking back on these designs (I'm writing this in the middle of August) is how I've definitely become more enamoured of cats with arms. It's interesting how your tastes and style changes over time, even though the fundamental style is still undeniable Quernus :)
Paramedi-Cat (b.6 May 2010)

Who wouldn't want this handsome Paramedi-Cat to come and look after you?! Many thanks to Glenda for commissioning this wee guy. I think his white tee-shirt has a certain 'Levi ad' appeal, if you know what I mean ;)
Wee Curum (b.1 May 2010)
 |
| Wee Curum |

The top photo shows Curum as a much younger dog. As she got older, the black markings on her forehead faded away. To get the black of her muzzle fading to tan, I used a Skinner blend and then shaped it carefully over her muzzle. I used part of the Skinner blend for the inside of her ears, and also applied small triangles of black clay around her eyes. For her body markings, these were a mix of black, and black/tan. I made up the latter using the fur cane technique and cut the shapes out freehand.

I finished off Wee Curum's tail by having it curl round her body - I added some of the fur cane as well. Curum was always a bit mad, but was fiercely loyal and my sister loved her.
The Happy Couple Part 2 (b.30 April 2010)
 |
| Hiking Cats |


I love the girly rucksack - the white piping helps to give if that 'high street' look, and I get the impression that she's not really a serious hiker :) But then, with a Nick Park-designed tent, who am I to say?!
 |
| Living happily ever after in a Nick Park tent!! |
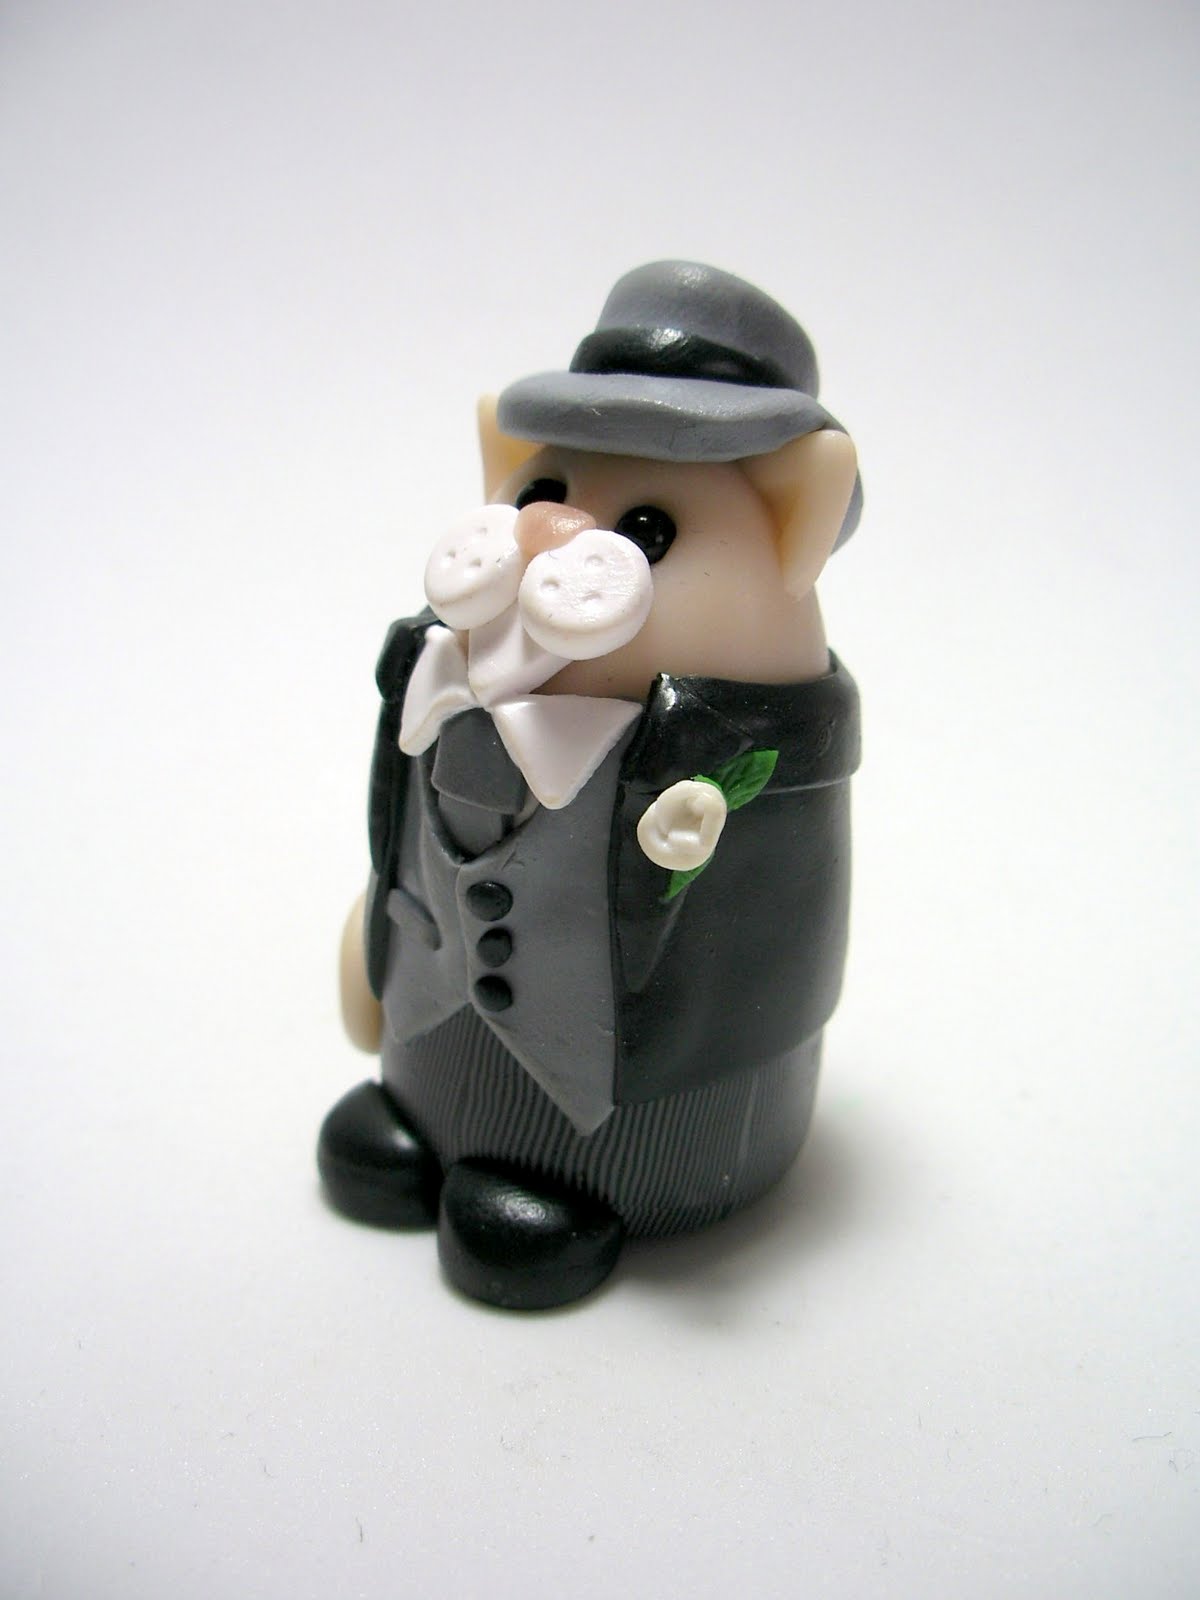
The Happy Couple Part 1 (b.30 April 2010)

A former colleague of mine from work asked me a few months ago if I could make up a wedding cake topper for her son's wedding. In fact, she wanted two couples - one for the formal cake, and another couple for a second cake - more on that story later!
The brief was for flesh-coloured cats, an ivory dress and purple/lilac flowers and lilies for the bride, and a morning suit for the groom. Oh, and they had to be exactly 4.5cm tall. No more, no less. Well alrighty then!

For the back of the wedding dress, I created a confection of loops from a thin strip of ivory clay, and of course, the cats had to have their tails curling towards each other :)

Police Mole (b.14 April 2010)

'ello, 'ello 'ello, what's all this then? This is Police Mole, that's what! Police Mole came about as a commission request through the website from Laura, a friend of Eloise, who had seen Dr Mole.
I spent quite a bit of time researching the shape of the helmet, and making sure it was as accurate as possible. Ditto the shield on the front, which I made up with metallic silver clay. For the truncheon, I used brown clay with a wire armature inside to keep it strong, and of course it had to have a wrist strap :)

Evenin' all!

Star Wars Cats (b.7-11 April 2010)

Thought it was time that I got round to writing about my second batch of Star Wars Cats - and here they are! These came about through a message (or convo, as I believe they're called) on Etsy - a lovely American lass wanted to commission three new characters to add to their quirky Star Wars collection.
As you can see, the request came in for an R2D2 Cat, a Princess Leia Slave Girl Cat, and a Han Solo in Carbonite Cat. I could see how the first two would work straight away - R2D2 must have feline blood in him somewhere! - but I needed to give some thought to Han Solo.

I tackled R2D2 Cat first, and I went for a look that was as close to the original as possible (excepting the ears and tail, of course). It was actually quite hard to find a picture of R2D2 from behind, so I ended up watching one of the films - ah, the sacrifices I make for my art :) Turns out, all the fun stuff happens on his front, but at least I'm happy that the wee mite is a pretty good representation of the real thing. I even managed to put the orange rubber tubing on his feet :)

Next up was Princess Leia Slave Girl Cat. Now, I had some misgivings about this one. The costume is positively indecent! Couldn't have one of my cats letting it all hang out, even if it was for a good cause! But in the end, I overcame my qualms and got on with it. Again, I went for detail and took sketches of the bikini design. I used thinly extruded gold clay to form the pattern and a thin sheet of deep red clay for the fabric. It felt a little strange to be using a flesh-coloured clay, but I think the overall effect works out quite well. I even plaited strands of extruded brown clay for the hair. Now that's dedication.

And then came the fun part! Now, I had given quite a lot of thought as to how I should embed the Han Solo Cat - resin? clay? I wasn't sure, but I picked up a plastic mold when I was last in Manchester. And then I decided to just go for the simplest option - plaster of Paris.
Before I got down to all that, I made up Han Solo Cat himself. I used scrap clay for this and gave him arms with outward facing paws (a precursor to my recent Cats With Arms range!) I also dressed him with an open necked shirt and trousers. I baked him first, and when he was cool, I placed him in the bottom of the mold and had to prop him up with some wedges of clay so that the front of him would poke out of the clay. That was actually quite a tricky part because he kept rolling around in the bottom of the mold. (I resorted to Blutack in the end.)


I put an coat of black acrylic paint on, and then applied an antique wax coat in a gunmetal grey. And do you know what? I'm really, really pleased with the way he turned out!
Subscribe to:
Posts (Atom)