*THIS BLOG IS NO LONGER UPDATED*

My new website can be found at http://www.quernuscrafts.co.uk/

Showing posts with label Character Commission. Show all posts

The Alternative Legal Profession

16th August 2011
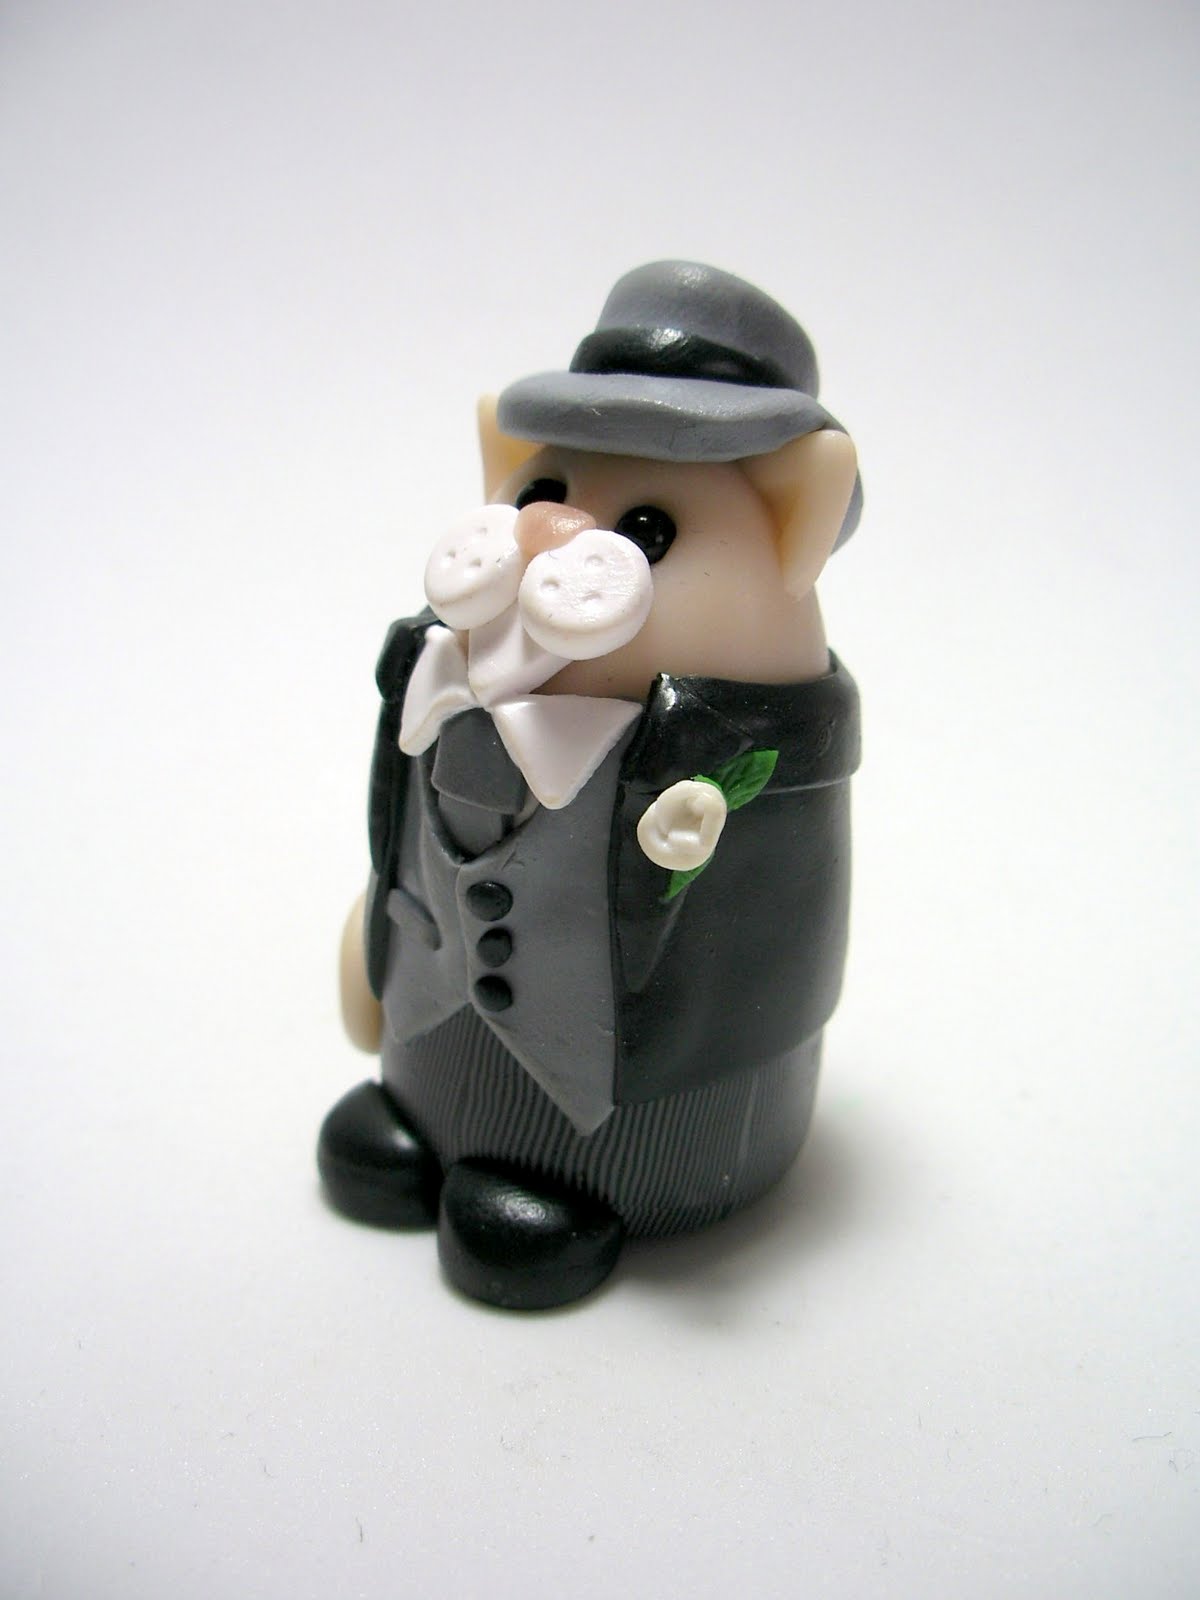
It took me quite a while to pluck up the courage to make some creatures decked out in the garb of my former profession, but once they started appearing, there was no stopping them!


First up is Mortimer the Barrister Mouse, whose inspiration is Rumpole of the Bailey. Standing at about 3.5cm tall, his diminutive stature is no indication of his prowess in the courts.

Wee Teddy (b.7 February 2011)


16th July 2011
I'd love to introduce you to Wee Teddy. Wee Teddy was a very special commission for a very special boy's birthday. The commission was from Tracy of Ruby Spirit Designs and Kev of Dig the Earth, two extremely talented and lovely people who just happen to be married to each other! (And in actual fact, I own works of art created by both these lovely people - do pop along and visit their websites when you get the chance :)

Three Blind Mice (b.5 January 2011)


19th June 2011
Another stroll back down Memory Lane as we revisit a fun piece I made just after New Year as part of my Fairy Tails series.

The Glenfiddich Gang (b.13-16 February 2011)


17 May 2011
It definitely feels like the right time to revisit these six characters, which were commissioned by a professional poker player for his team, The Glenfiddich Gang! It all started with the Mole in the centre of the shot - the poker player's nickname is The Mole, and when he saw the Moles listed in my Folksy shop, he asked if I could make a Mole Card Protector.

Coco Chanel Cat (b.8 April 2011)


22 April 2011
After introducing Scott of the Antarctic Cat, I thought now would be a good time to shine the spotlight on Coco Chanel Cat. Requested by the same lovely person who commissioned Scott, I enjoyed the same process of researching a historical figure with a very striking and recognisable style.

Scott of the Antarctic Cat (b.18 February 2011)


25 March 2011
I thought I'd leap forward in time a little bit and take a look at a more recent creation. Scott of the Antarctic Cat is one of my favourites, and a big thank you to Liz for commissioning him for her sister's birthday.

Blossom Cats (b.5 June 2010)

Blossom Cats
It seems like an appropriate time to introduce the second bunch of Flower Cats I've made, rather than keep to the strict chronological order of birth of my wee creatures! These Blossom Cats were a very special commission for a very special person - Anna Stassen of Sakura Jewellery.

Flower Cats (b.11 May 2010)

Flower Cats
After I sold the original Daisy Cat at one of the Ilkley Arts Markets, I decided to make another one. Which led on to two, which turned into three!

I wasn't sure whether to keep the body colour the same as the flower centre this time, and so I decided to make them a little differently. Using green as the body colour helps to make them look more like flower cat sprites, than cats in fancy dress (at least, that's what I think!)
Sunflower Cat
For SunFlower Cat, I used a millefiori cane to create the speckled seed head effect for the flower centre, and then I cut out lots of petal shapes from a thin sheet of yellow clay and attached two layers of them, the top layer overlapping the bottom layer, to a thin collar of green clay. It was important to create enough strength in the petals because otherwise the petals would 'wilt' during the curing process.

Rose Cat
Rose Cat is my favourite Flower Cat - because of the shape of the petals, I had to make the head a little narrower than normal, which make her look very odd before I added the petals! I cut large oval petals shapes from a thin sheet of red clay, and then trimmed them at the bottom once they were added.There are three layers in total. Once the petals were on, I added the small leafs around the collar.

I'm keen to experiment with other types of Flower Cats - not quite sure how I'll do a Foxglove Cat, but I'm happy to give it a go!

The Birthday Party (b.11 May 2010)

The Birthday Party
I made this to celebrate my birthday back in May - it seemed like the thing to do! And it was one of those pieces which just seems to grow arms and legs (although not literally in the case of my cats) as I went along!

I started out with the idea of having a cat in a party hat - and a fancy one at that, with stripes, a fluffy rim, streamers and a green bobble on top! And then I decided that he needed a party whistle, which I made from some of the striped clay with a short length of wire inside to keep it strong.

After that, it became obvious that the cat couldn't celebrate my birthday on his own - so I made him a wee friend, also with a party hat. And then they got hungry, so I made a birthday cake with a candle in it, and I gave them each a slice on small paper plates. You can tell I had quite a lot of fun :)

The Birthday Party has now taken up residence with Gemma, along with a number of my other wee creations, to celebrate her birthday. I love that kind of circularity!

Fireman Cat (b.10 May 2010)


I seem to be on a bit of an occupation theme here :) Fireman Cat came about when I was at the Ilkley Arts Market on 8 May. A lovely woman called Hilary asked if it would be possible for me to make a Fireman Cat for her friend, and straight away I could picture how he would look.


When I got back home, I did a bit of research as to what a fireman's outfit looks like these days. They've done away with the traditional outfit and now I think they look more like policemen with bigger helmets. So I decided to stick with Fireman Sam as my inspiration for the design.


For his axe, I used a millefiori cane to create the wood effect, and then made up the head using metallic red clay, with a silver tip.


I used silver clay blobs for the shiny buttons, and for his helmet badge. The important thing with making accessories for the cats, I've found, is not to skimp on proportions. Go large. I applied this principle to Police Mole, and now to Fireman Cat. As a result, their helmets actually do look as though they fit them properly, and aren't just a blob of clay balanced on top of their heads. It's a fine balance to achieve, but it's worth the extra effort, as it helps the design to gel together more and look more cohesive.


Another thing I've noticed looking back on these designs (I'm writing this in the middle of August) is how I've definitely become more enamoured of cats with arms. It's interesting how your tastes and style changes over time, even though the fundamental style is still undeniable Quernus :)

Paramedi-Cat (b.6 May 2010)


Who wouldn't want this handsome Paramedi-Cat to come and look after you?! Many thanks to Glenda for commissioning this wee guy. I think his white tee-shirt has a certain 'Levi ad' appeal, if you know what I mean ;)

The Happy Couple Part 2 (b.30 April 2010)

Hiking Cats
The second part of the commission for wedding cake toppers was for a pair of hillwalking cats, the bride and groom being keen hikers. And the exciting part of this was that these cats would be next to a tent created by one of the animators from Nick Park's team (he of the supremely wonderful Wallace and Gromit, Shaun the Sheep, et al)! OK, so I wouldn't actually get to meet them, but at least my wee cats would be in close proximity to Greatness - to say I was chuffed was a slight understatement!


The brief here was for boy cat to be brown, and the girl cat to be white. I used glitter white for the latter, as it has a softer appearance than ordinary white clay. I had lots of fun coming up with the accessories for them - from woolly walking socks (made from slices of cane), to walking poles (cocktail sticks painted black with clay handles, discs and straps), to rucksacks! The leather boots even have laces :)


I wanted the rucksacks to be as realistic as possible, so I hauled our rucksack out of the cupboard for a guide. I'm particularly fond of the hand at the top, and the way the 'elasticated' pouch at the front isn't flush with the rest of the rucksack. The piping around the edges has helped to I imagine he's got a rather battered Mars Bar in there for when he gets peckish!

I love the girly rucksack - the white piping helps to give if that 'high street' look, and I get the impression that she's not really a serious hiker :) But then, with a Nick Park-designed tent, who am I to say?!


Living happily ever after in a Nick Park tent!!

The Happy Couple Part 1 (b.30 April 2010)


A former colleague of mine from work asked me a few months ago if I could make up a wedding cake topper for her son's wedding. In fact, she wanted two couples - one for the formal cake, and another couple for a second cake - more on that story later!

The brief was for flesh-coloured cats, an ivory dress and purple/lilac flowers and lilies for the bride, and a morning suit for the groom. Oh, and they had to be exactly 4.5cm tall. No more, no less. Well alrighty then!

I made the groom up first, and went for as much detail as possible. From the stripey trousers (don't you just love pasta machines?!) to his waistcoat buttons and a cute wee button hole. We had a bit of a 'hat-on-hat-off' dilemma, as the top hat took him a few millimetres above the required height, but I'm glad to say we managed to resolve that without too many tears.

I had so much fun making up the bride! From her wee ivory shoes, which have a purple seed bead as decoration, to the bouquet of white lilies and purple flowers. She also has a veil - I shaped some thick silver wire into a semi-circle and threaded on a small square of netting. I added some seed beads to either side, and then shaped the ends of the tiara to create a front decoration. It was fiddly work, but I love the effect! I secured the tiara and veil to the cat using liquid polymer clay.


For the back of the wedding dress, I created a confection of loops from a thin strip of ivory clay, and of course, the cats had to have their tails curling towards each other :)

And they lived happily ever after

Police Mole (b.14 April 2010)

Moleson of Dock Green

'ello, 'ello 'ello, what's all this then? This is Police Mole, that's what! Police Mole came about as a commission request through the website from Laura, a friend of Eloise, who had seen Dr Mole.

I spent quite a bit of time researching the shape of the helmet, and making sure it was as accurate as possible. Ditto the shield on the front, which I made up with metallic silver clay. For the truncheon, I used brown clay with a wire armature inside to keep it strong, and of course it had to have a wrist strap :)


Evenin' all!


Star Wars Cats (b.7-11 April 2010)

May the Purr be with you

Thought it was time that I got round to writing about my second batch of Star Wars Cats - and here they are! These came about through a message (or convo, as I believe they're called) on Etsy - a lovely American lass wanted to commission three new characters to add to their quirky Star Wars collection.

As you can see, the request came in for an R2D2 Cat, a Princess Leia Slave Girl Cat, and a Han Solo in Carbonite Cat. I could see how the first two would work straight away - R2D2 must have feline blood in him somewhere! - but I needed to give some thought to Han Solo.

The side of R2D2 you never get to see

I tackled R2D2 Cat first, and I went for a look that was as close to the original as possible (excepting the ears and tail, of course). It was actually quite hard to find a picture of R2D2 from behind, so I ended up watching one of the films - ah, the sacrifices I make for my art :) Turns out, all the fun stuff happens on his front, but at least I'm happy that the wee mite is a pretty good representation of the real thing. I even managed to put the orange rubber tubing on his feet :)

Princess Leia Cat

Next up was Princess Leia Slave Girl Cat. Now, I had some misgivings about this one. The costume is positively indecent! Couldn't have one of my cats letting it all hang out, even if it was for a good cause! But in the end, I overcame my qualms and got on with it. Again, I went for detail and took sketches of the bikini design. I used thinly extruded gold clay to form the pattern and a thin sheet of deep red clay for the fabric. It felt a little strange to be using a flesh-coloured clay, but I think the overall effect works out quite well. I even plaited strands of extruded brown clay for the hair. Now that's dedication.

Can you guess what it is yet?

And then came the fun part! Now, I had given quite a lot of thought as to how I should embed the Han Solo Cat - resin? clay? I wasn't sure, but I picked up a plastic mold when I was last in Manchester. And then I decided to just go for the simplest option - plaster of Paris.

Before I got down to all that, I made up Han Solo Cat himself. I used scrap clay for this and gave him arms with outward facing paws (a precursor to my recent Cats With Arms range!) I also dressed him with an open necked shirt and trousers. I baked him first, and when he was cool, I placed him in the bottom of the mold and had to prop him up with some wedges of clay so that the front of him would poke out of the clay. That was actually quite a tricky part because he kept rolling around in the bottom of the mold. (I resorted to Blutack in the end.)

Which version do you prefer?Spot the difference
I've never done plaster casts before, and I can tell you now that it's messy stuff. Still, I managed to get it to the right consistency, and then came the tricky part of pouring the plaster into the mold whilst keeping the cat in the right place. Once I'd poured the plaster in, I let it dry for about 30 mins, and when it was tacky I used a small ball of rolled up kitchen foil to mark the top of it. I also 'painted' a bit of plaster over the front of the cat so that none of the original clay showed through. Then came the tedious bit - waiting for him to dry. It took a full 3 days, despite me sitting him on the window ledge (it was quite sunny in April), and tucking him under the radiator. Still, he eventually dried out, and then I could paint him.

I put an coat of black acrylic paint on, and then applied an antique wax coat in a gunmetal grey. And do you know what? I'm really, really pleased with the way he turned out!

Mr Sparkle the Gnome Cat (b.30 March 2010)

I don't feel silly in this hat, honest

So, we have here Mr Sparkle the Gnome Cat. Mr Sparkle the Gnome Cat came about in an interesting way (as you would expect from such a character). I have Debbie Young to thank for this particular commission, and when thanking Debbie, I must also thank her cousin, Gemma, who made the introduction.

Gemma, you may recall, was the first person to ask if I could make cats wearing certain 'outfits'. This was back in October 2009, and first of all I was a bit alarmed by what she meant. Turns out she wanted a 'Pirates vs Ninja' theme, and I was glad to oblige! You can see the cats which started the ball rolling here.

Gemma then came back a few months later and commissioned the Wizard of Oz Cats - and so when I received an email from Debbie, saying that she loved the cats I had made up for Gemma, I didn't really know what to expect!
Mr Gnome says, 'Brush your teeth'
Debbie explained that she and her husband are cat lovers (being owned by four of them), and a little while ago she bought her husband a gnome. (Bear with me here.) However, after paying Mr Gnome less attention than he deserved, Debbie kidnapped it and sent him on his travels. A Facebook page was set up documenting Mr Gnome's adventures (current membership: 52) and fun was had by all as Mr Gnome went round the world.
Mmmm, lunch
Debbie's request was simple. Could I make a cat in a gnome hat as an homage to Mr Gnome? Of course, I cried (not literally). The cat model in question was Sparkle (see, it's all beginning to make sense now).

And so, in my own homage to The Fly, Mr Sparkle the Gnome Cat was born. However, I declined to perch him on a bicycle (realism isn't everything, you know). Mr Sparkle the Gnome Cat is, however, sporting a natty red gnomey hat, green coat with gold buttons, blue trousers and brown boots. And let's not forget that fine bushy beard. Now that gives me an idea for Brian Blessed Cat... ;)

The Glamourpuss Girls (b.22 March 2010)


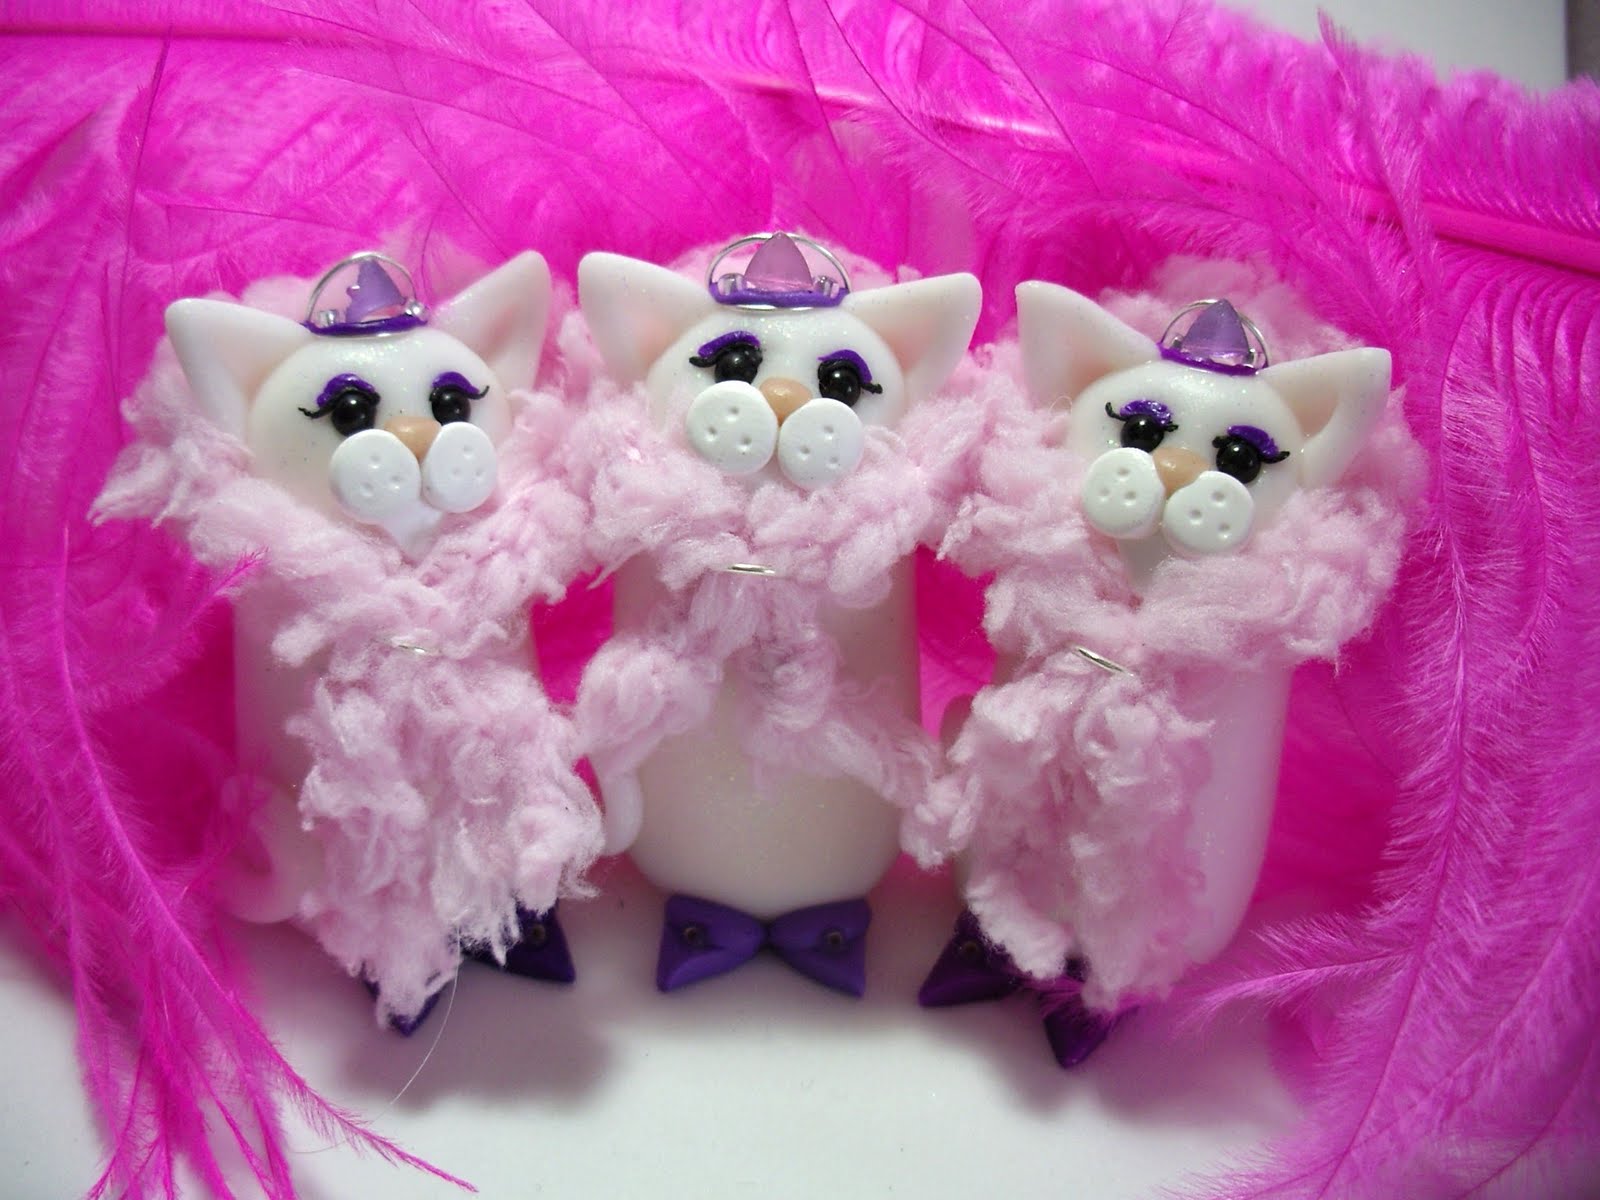
Hot on the heels of Bedtime Kitten, here are the Glamourpuss Girls! Another commission from Michelle from Across The Pond (along with Wee Duma), I sent these three debutantes (can't get the Sheila's Wheels tune out of my head) off to paint the town red in Boston!

Michelle wanted the three wee cats to be exactly the same as the first Glamourpuss I made for Kate Fife's eponymous jewellery business, Glamourpuss Jewellery. However, I couldn't resist tweaking things a little bit :)

The main differences were in the tiaras and the feather boas. Glamourpuss The First had a polymer clay tiara and the boa was glued on. For these sassy gals, I made the tiaras out of thin wire, which was a bit fiddly, but very much worth the effort. For the feather boas, I plaited three strands of fluffy pink wool together, tied the ends together so they wouldn't come apart, and then draped them round their shoulders, securing them with a jump ring. This means they are adjustable and removable. Well, whatever next!

What I love most about them is that although the intention was to make them all the same, each one still managed to have her own personality (not to mention shoe colour) - the one on the left looks a bit haughty, whereas the middle one looks like the kindly one. The one on the right looks like she's ready to go out and have a good time! Do you know, these wee creatures never cease to amaze me - so much personality packed into 5cm of clay!

Bedtime Kitten (b.21 March 2010)

Bedtime Kitten

I had so much fun with this wee kitten! She was one of those ideas which kept on building and building, and it all started from taking part in a Fashion Night in Ilkley on 26 March.

I had been contacted back in November by the organiser of this fashion night, asking if I wanted to have a stall at the event. It was an evening affair, and was being run for charity. So I was happy to give it a go and see how it went. Part of the arrangement was that stallholders were to donate a raffle prize for the evening.

The event was billed as a 'Girls' Night In', with an invited audience of women. So after toying with the idea of making a cat in full fashion gear, I decided to go with my idea of what girls wear when they're having a night in!
The original girls' night in

The cat on the left was the first one I did - there had to be a face mask, curlers, dressing gown and, of course, rabbit slippers. However, the face mask didn't work out quite as well as I had hoped (Zombie Cat, anyone?!), and so I made another cat without it. I love the terry towelling effect on the dressing gowns - I used a stiff wired brush to imprint the clay whilst it was still a thin sheet (the same brush I used to create Wee Ella's coat).

I donated both these cats to the charity event as the raffle prize, but couldn't resist going on to experiment further, and Bedtime Kitten was born! As well as the dressing gown and rabbit slippers (I have fond memories of those from my childhood), she had to have a tiny teddy bear and a hot water bottle.

The teddy bear was probably the most fiddly to make - bear in mind (no pun intended) that Bedtime Kitten only stands 5cm tall - but I was glad that I had tiny black beads for his eyes to keep with the Quernus look (by comparison, Bedtime Kitten had 3mm black onyx beads).

The hot water bottle was a little easier, and of course it had to be a furry one :) Bedtime Kitten was sold at the Ilkley Arts Market on 10 April, and I have to say I was a little sorry to see her go - she looks so cozy and snug, and there may just be a hint of self-portrait in her!

Scientist Cat (b.16 March 2010)


Scientist Cat was a special commission for Alison, who's daughter is graduating this summer with a science degree. Alison contacted me through the website, and when she outlined what she was looking for, my mind when into overdrive!

Liverpool FC Scarf Cat (b.3 March 2010)


Hot on the heels of the Wizard of Oz Cats, the lovely Gemma also wanted to know if I could make up some presents for her two bosses, who are both opticians. One of her bosses is an avid Liverpool FC fan, and so the Rainbow Scarf Cat seemed an obvious choice for her, with some modifications.

I did a bit of research to find out what the Liverpool FC scarf looked like. I had no idea there were so many designs out there! There are away scarves, Carragher scarves, County fan scarves - you name it, there's a scarf for it! So I followed Gemma's instructions and made a red scarf with LFC lettering on it. I also added the white tassles using extruded clay, as that seemed more 'footbally' for some reason.
Liverpool FC Scarf Cat with Liverpool FC badge!

I also made up a small Liverpool FC badge for the kitty - this was a tad fiddly, but if you squint just a little, you can just about make out the dragon/wyvern shape in the middle! (And I apologise now if I've got the species wrong - I have no idea what's supposed to be in the middle of the LFC crest!) And because the cat was destined for an optician, of course he had to have a pair of glasses too!

Next time, I'll be introducing Wee Sam, the black labrador, which Gemma wanted for her other boss.