*THIS BLOG IS NO LONGER UPDATED*

My new website can be found at http://www.quernuscrafts.co.uk/

Wee Jet and Wee Tater (b.20 March 2010)

Wee Jet and Wee Tater

Back in March (it is now the end of May - I am so behind in posting about my creations!), I received an order through my Etsy shop for two custom wee horses. When I received the photographs of Jess and Tater from Carianne, I nearly jumped up and down with delight! I had another chance to make a Wee Appaloosa horse, and a leopard appaloosa to boot!

Tater

Because of his white coat, Tater's spots (particularly on his body) had a dark brown centre, which faded to paler brown. This gave me a chance to try a new technique (I like it when that happens!) I made up a bull's eye cane using brown at the centre, and then wrapping this in a thin sheet of translucent clay which I'd coloured with a pinch of the same dark brown.

Overall, the effect worked pretty well, and for the other spots, I just used tiny dots of colour, which I could spread out into random shapes using a clay shaper.

Wee Tater
But what to do with the leftover canes?! Because I used spots of varying sizes, the canes that were left had varying diameters. This is because it's often best to keep a cane intact and just reduce down a portion of cane to the desired size. So I was left with a number of lop-sided canes without any real prospect of making a wee leopard appaloosa in the near future. I decided to have a bit of fun, and made up this random sculpture using the leftover canes and the extruded clay from the mane and tail (Tater had unusual colourings for both). I'm not quite sure just what it is, and (in the words of Tom Paxton's The Marvelous Toy), I guess I never will!

The Marvelous Toy...in clay form

Wee Lily (b.18 March 2010)

Wee Lily

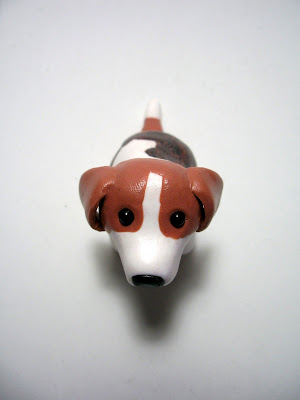
On 10 March, I got a message through Folksy from Lucy Westwood of The Sleep Valley Co, where she sells her own handmade gorgeous soaps and bath bombs. The message title was most intriguing - "Can you quernus my beagle??" I'd never seen Quernus used as a verb before, and I loved it!

And when Lucy sent through pictures of her gorgeous beagle, Lily, I loved her too - she's the gorgeously doe-eyed pup ever, and I'm sure she knows it!

Lily
I made up a special fur cane for the patches on Lily's back mixed up with nearly black and a darkish brown, and also blended a lighter tan colour for the markings on her face and her ears. I drew sketches of where the markings should go, and for the darker patches, I cut thin slices from the cane, laid them out into a sheet, and then cut the markings in one go, to help keep the fur looking smooth. As usual, I made the tail with a short wire armature for extra strength.

For the head, I repeated the process with the tan clay, and then added those wonderful long floppy ears. However, there is a sad tale to tell about these ears. As explained in her blog post, Lucy tells how when she was
Nose to nose
photographing Wee Lily beside Big Lily (and the photos are just gorgeous), Wee Lily became quite attached to Lucy's elbow and sadly ended up on the floor. As a result, Wee Lily's left ear became less attached to her head. However, an express trip back to Leeds resulted in some remedial surgery, and Wee Lily's temporary deafness was swiftly reversed.

It's well worth checking out Lucy's wonderful Folksy shop - she very kindly sent me some lavender soap as a thank you for fixing Wee Lily's ear, and it's just lovely stuff! And all entirely handmade with only natural ingredients. Mmmmmm!

Wee Lily helps out online

Duma (b.16 March 2010)


Quernus seems to have a bit of a fan base on the side of the Pond! I have some amazing friends over and they have been very kind about spreading word about my wee creatures. And as a result of that word-spreading, Wee Duma came into existence!

Michelle from Boston contacted me through the website saying that she'd just spent the last 30 minutes on my site, and could I please make her up some cats if she sent through pictures? So she sent through some pictures of her gorgeous cat, Duma.

Duma
Because of Duma's wonderful stripes, I tried out a new technique using a fur cane and pastels. I covered the clay core with thin slices taken from a fur cane I made up based on Duma's colouring, blended the slices, and then I made up the cat as usual. I baked the cat, and once cool, I brushed on stripes using powdered black pastels. I then varnished the pastels to seal them, and the end result turned out quite well.

However, I am still on the quest to perfect the fur technique for stripey cats - I am still very fond of making up the stripes by mixing up the appropriate colours, resulting in a swirly impression of stripes, rather than a realistic representation. Somehow, the cats seem to have a bit more charm with the swirls, but that could just be me :)

'I'll put on my swirly coat next time I go out...'

Scientist Cat (b.16 March 2010)


Scientist Cat was a special commission for Alison, who's daughter is graduating this summer with a science degree. Alison contacted me through the website, and when she outlined what she was looking for, my mind when into overdrive!

Jess and Cinnamon (b.14 March 2010)


Meet Wee Jess and Wee Cinnamon! Commissioned by Andy as a gift for his parents, Andy got in touch with me through the website, emailed me some pictures, and I got started!

Jess
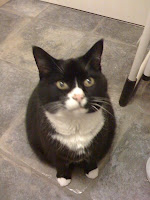
Wee Jess is a gorgeous black and white cat, with a white bib and partially white nose. It was just a case of getting the markings in the right place. For the bib, I applied a thin sheet of white clay cut to shape, and then blended the edges out to create a fur effect.
Cinnamon
Wee Cinnamon was a little more challenging as she has the most incredible markings on her back.
Wee Cinnamon
I had to imagine what Cinnamon's markings would look like from above so I could translate that into clay form. I sketched out the markings based on all the photos that Andy sent me (thanks Andy!), and then plotted those on an overhead view. It was like piecing together a jigsaw!

The End

Bobble Hat Cat and Rainbow Scarf Cat (b.14 March 2010)

Bobble Hat and Scarf Cats

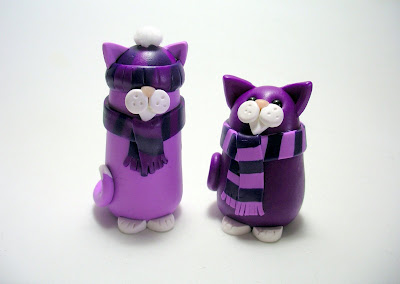
Do you know, it's been a while since I blogged about some of my more 'mainstream' designs - looking back, I've only tended to write about the commissions I've made (and granted, I've had a lot of those :) So I thought it would be fun to reintroduce a couple of old favourites (and when I say old, I first made this design back in October, so they're hardly about to draw their pension!)

I've recently discovered a new way of making stripy scarves that I'm rather pleased about. When I first started making Rainbow Scarf Cats, I took two thin logs of contrasting clay, twisted them tightly together and then rolled them sideways on through the pasta machine. Then I trimmed the two long edges and hey presto, the scarf was made. There were some limiting factors to this method, although on the whole it worked very well. Firstly, it was difficult to use more than two colours, and sometimes the resulting scarf wasn't wide enough after rolling the twisted log through the pasta machine.

New Rainbow Scarf Cat

I got the idea for the new stripy scarf from the wedding couple cats I made a few weeks ago in May (I'll be writing about them soon when I've caught up with the backlog!) I made up pinstripe trousers for the groom by layering black and grey sheets of clay together, cutting them in half, stacking the halves on top of each other, and reducing the cane down so the stripes were very thin. I applied this same technique for the stripy scarf using lots of different colours of clay, which resulted in lots of neater stripes of as many different colours as I wanted!

Rainbow Scarf Cats and Bobble Hat Cats are available for sale in my Folksy shop - click here to see the full range.

Wee Mice (b.7 May 2010)

Wee Mice

To continue honouring the rodential theme of the last few posts, I'd like to share with you my Wee Mice. I've been thinking about them for a while now, and they finally came into being at the end of last week! I started out with the traditional 'sugar mouse' pose, but then some of the wee mice wanted to look up at the sky, and thus the 'star gazing' pose was born. It was the same with colours - I started off with the grey mice, and then a brown one put his wee paw up to be made, and of course then I just had to make some white mice so they wouldn't feel left out.

Wee White Mice

I used the fabulous Super Sculpey for the inner ears, nose and tail, and once they were made, they all told me they were hungry. So I made them a wee piece of cheese. However, a few of them have eaten far too much of it and are getting a little tubby...

Who ate all the cheese?

The tallest mouse (the white star-gazing mouse) stands very tall at 2.5cm, and the shortest one is about 1cm tall. They made their debut on Saturday 8 May in Ilkley and proved to be most popular (they were very happy sitting on their very own display shelf - more on that story later!)

I'll be listing the Wee Mice (each one comes with his own lump of cheese) on Folksy this week!

Wee Cookie (b.10 March 2010)

Wee Cookie

So here's the last of Laura's commissioned wee creatures - Wee Cookie, a Roborovski hamster (or Russian hamster, as I've always known them).

Because this type of hamster seems to spend a lot of time sitting on its haunches (probably so that it can see better before it's so tiny!), I decided to make the miniature version in that pose as well. Making the body shape was relatively straight forward, and I spent most time working on the fur effect. You can see from the picture that Cookie has quite distinctive markings - the fur on his back is black/brown, and he has a white underbelly. He also has white eyebrow points. I made up a 'fur' cane combining dark brown and a paler brown, and once this was ready, I cut thin slices from it and made up a large sheet of 'fur'. I blended the slices together to make a continuous sheet, and then cut out the markings from this. I've found that this is a better way to create markings, rather than applying cane slices individually.

I made up quite sturdy feet for Wee Cookie, and then used 4mm round black beads for his eyes. This is the largest bead size I have, and I only use them for Piglings (for wee piglings and cats I use 3mm beads, and for wee horses, moles, etc I use 2mm beads). Although it felt weird to be using such a large bead, it definitely worked because the real Cookie has huge eyes!

Wee Cookie is 3cm all round, so he's probably nearly life-size compared to the real one! Thanks again to Laura for commissioning him - it's just so much fun to meet new wee beasties!

The end

Wee Jellybean (b.10 March 2010)

Wee Jellybean

Along with Wee Smudge, Laura wanted miniature versions of her two hamsters, Jellybean and Cookie. Laura describes Jellybean as a "Me, me, pick me, love me" sort of hamster - having owned a hamster in the past myself, who was more of the "Come near me and I'll bite your hand off" sort, it was a pleasure to meet one of a more congenial bent, albeit in photographic form only!

Jellybean
Jellybean is not a good model. She won't sit still for a minute, as you can see from this action shot. As it happens, Wee Jellybean probably ended up more life size than miniature - she measures 5.5cm long and 2.5cm tall!

Wee Jellybean was fairly straightforward - it was more a question of getting her markings in the right place, and getting the shape right. I also wanted to include wee paws for her, as these are more evident with hamsters than rabbits. I made her ears from the wonderful Super Sculpey beige to give a translucent effect. And after positioning the sandy patches on her body, I blended the edges so that they merged more with the white body - helps to give a more furry effect.

Next up is Wee Cookie - watch this space!

The end

Wee Smudge (b.10 March 2010)


Meet Wee Smudge, the first rabbit commission by Quernus. Many thanks to Laura Schofield for commissioning a miniature version of Smudge, along with Cookie and Jellybean (her two beloved, if hyperactive, hamsters). I'll be writing more about the hamsters next.

Laura was already acquainted with the Quernus menagerie after her friend, Steph, commissioned me to make up four wee horses for Laura back in December (click here for the original post).

Smudge was a standard sooty fawn rabbit with wonderful floppy ears. He's no longer with us, and Laura wanted a reminder of her wee bunny. This was one of the first times I used the refined fur technique, which is based on the Starry Night cane (click here for more details). After mixing up the clay and rolling it through the pasta machine several times, I tweaked the technique a bit. Once I'd stacked the slices together, I shaped the cane into a square and then reduced it until it was about 20cm long. I cut it into four equal lengths to stack them back together as a square cane. However, instead of lining up the sections so that the strands were perpendicular to each other, I had them all lined up in the same direction. This meant that when the slices of the cane were applied to the clay body and lightly blended, this created quite a realistic fur effect. And I just love his wee bobtail!

The end