*THIS BLOG IS NO LONGER UPDATED*

My new website can be found at http://www.quernuscrafts.co.uk/

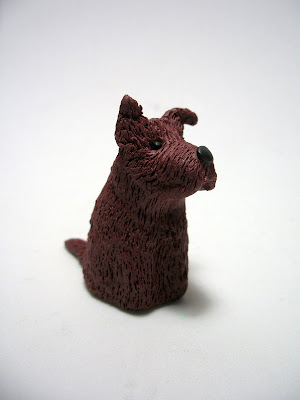
Wee Dog (b.1 March 2010)

Wee Dog

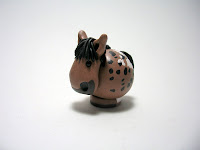
After thoroughly enjoying making Wee Niko (and another wee dog I can't mention yet - Wee Eva, a Hungarian Visler, is for a birthday present!), I wanted to try out some more wee dogs. So with a lump of scrap brown clay in hand, I decided to make up a wee Scottie dog.

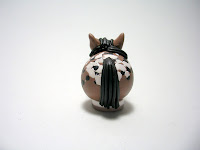
Wee Dog is a bit smaller than my usual creations (I didn't start out with enough scrap clay!), and he only stands about 4cm tall. Once the basic shape was modelled, I gently pinched the side of the nose to create the beard. I also added a few tiny logs of clay above the eyes to create the eyebrows. Once all the extra bits of clay were blended in, I added his eyes and shaped the ears. I shaped the tail around some strong wire for an armature. I then took a scalpel to him (sorry - it really didn't hurt him, honest!)

Wee DogI created the fur texture by making tiny shallow cuts with scalpel. This was quite time-consuming. It was also important to keep the strokes going in the right direction to give a more realistic result. For example, I created a parting over his nose, and did upstrokes for the eyebrows and ears.

I have to say that the end result made all the effort worthwhile - I love the way his wee head is slightly tilted to one side, with an ear slightly cocked. I haven't got a name for him yet, so if you've got any suggestions, I'd love to hear them! I now just need to find a way of creating the same effect in a less laborious way...

The End

The Wizard of Oz Cats (b.27-28 February 2010)

The Wizard of Oz Cats
The lovely Gemma, who started this whole character cat thang off with her request for Pirate and Ninja Cats, got in touch with me once more in January asking if I could make up four Wizard of Oz Cats, as this was her favourite film. And so the journey to creating Catothy Gale, Tin Cat, Scarekitty and Cat-ardly Lion was begun!

I started with Tin Cat, making him out of silver clay. I referred to stills from the original film to get the general ideal - the most obvious features of Tin Man were his raised collar, and the funnel on his head. I added rivets to the body by rolling tiny dots of silver clay and applying them to thin strips of clay.

The Scare-Cat was next, and I made him up in a number of different layers. Because he had brown trousers, I made up a body of brown clay. Next I added a green tunic which sits over the trousers, and then I finished off the look by adding a sheet of clay over the head - those aficionados of the film will be aware that the Scarecrow had a bag over his head, tied at the neck with string. So I extruded some rope-coloured clay and twisted two strands together to create the rope, which I then placed around the neck, the waist and around his floppy brown hat.

Catothy Gale and Toto
Dorothy Cat came next - she was similar in some respects to Princess Leia Cat in that I used a flesh-coloured clay for the body, and then 'dressed' her with a blue pinafore dress. Her ruby slippers were made from metallic red clay shaped to a point. I made the hair from extruded clay which I then loosely gathered into sections to create a more realistic style. Wee Toto is only 2cm high and made from black clay - next time I'll put him in a basket!
Last, but certainly not least, came the Cowardly Lion. It seemed a bit daft to make up a lion to look like a cat, and so I decided to use my existing Lion design, with a few modications of course!

The most important change was giving the Cowardly Lion some paws so that he could hold his tail in a rather cowardly way. I also made his mane more curly, as the Cowardly Lion in the film had definite ringlets (which I always thought was a little bit suspect). He also had a red bow in his hair (which did nothing to alter my opinion), and a couple of well-placed flicks of the scalpel gave a rather scared expression to his face.

I so enjoyed making up these cats, I can't wait to start making up some more - and I particularly enjoy making up character sets, like these ones, and the Star Wars Cats. I have plans to make Dr Who Cats (with Tom Baker (of course) as the Doctor, K-9 and a Dalek Cat) and Robin Hood Cats (with Robin Hood, Maid Marian and Friar Tuck). And that's not to mention the Cat-ivity Scene I plan to make up closer to Christmas! Oh, so many ideas, so little time - and once again, many thanks to Gemma, who makes beautiful jewellery under the name of Cosmiceden, for setting my feet upon this path.

And they all lived happily ever after

Liberal Demo-Cat (b.23 February 2010)

Vote for me!
Lowri was one of my first customers. Way back in October last year, she ordered the Ultimate Rainbow Cat from my Folksy shop. And then in February, she bought a Custom Character Cat and asked if it would be possible to make up a Politician Cat, as her boyfriend was a great Liberal Democrat supporter.

Can I kiss your baby?
As soon as I got Lowri's request, I could immediately see a cat in a suit with a yellow rosette, holding a placard, and Liberal Demo-Cat was born! (Unfortunately, I cannot take credit for coining the name - that honour goes to Greg.)

I do like dressing my wee cats up! For the suit, I rolled out a thin sheet of grey clay, and then cut it into a strip about an inch wide, using a tissue blade to make it curved. This is because the body is slightly conical, and cutting the strip with a curve in it (like a slightly ironic smile), allows the 'fabric' to lie flat on the body. I cut out the lapels
Lib Dem logoand a thin strip for the collar, finishing off with small white triangle for the shirt, which I tucked behind the suit. A smart tie and shiny brown shoes finish off the look!

For my next trick, I worked on the placard. I made up the basic shape by cutting out two thin squares of black clay and then sandwiching them together with a yellow lollypop stick in between. Next for the logo. I really like the Lib Dem logo with its simple shape and elegant curves. I wanted to replicate that as closely as possible, so I rolled out some yellow clay very thinly and then cut tiny strips for the component parts of the design. Please bear in mind that the placard is only 2cm square, and so the logo itself was about 1.5cm square. Just as well I like working on a small scale!
The real Lib Dem logo

To attach the placard to the cat, I added a paw and lots of liquid polymer clay. Liberal Demo-Cat stands 4.5cm tall, and is 3.5cm at his widest (too many constituency lunches).

Thanks again to Lowri for commissioning Liberal Demo-Cat - in the interests of fairness and impartiality, I will now make up a Cat for each political party.

This ends the party political broadcast for the Quernus Party.

Mole Family (b.28 February 2010)

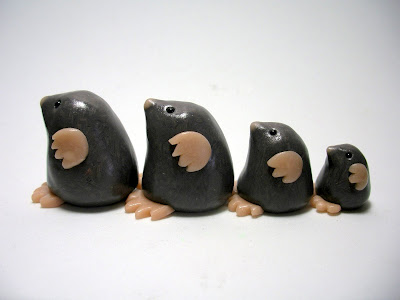
Meet the Mole Family
I have a confession to make. I have fallen in love with Dr Mole. I love everything about him - the rotund shape, his moley paws, his furriness, his wee pink nose - basically, I am just a big fan of moles!

After making Dr Mole, I had quite a lot of the fur effect cane left over, and so I went a bit mole-mad and made up a whole family of them. And of course, being me, I wanted to see how small I could make them!

The largest mole stands 4cm tall, whereas the wee baby one (who is clearly very fidgety and just wants to go out and play) is just under 1.5cm tall. Making the paws for the smaller moles got quite fiddly, the beige Super Sculpey is just perfect for mole paws.

I took the Mole Family to the Ilkley Arts Market on 13 March, and sold them that day. I'm looking forward to making up the next batch of moles - they are just too cute not to be making a regular appearance!

Moli', molin', molin' - keep those moles a'molin'

Wee Spiderpig (b.21 February 2010)

Wee Spiderpig
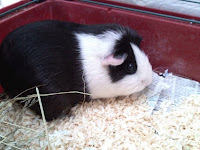
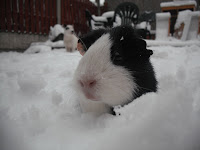
Laura, who had commissioned me to make Wee Niko, also wanted me to make up a Wee Spiderpig. Spiderpig is a very cute black and white female guinea pig, and I believe she is what is known as a Dutch guineapig.

Spiderpig
I had never made up a guinea pig before, but that's never stopped me! I do love creating a new wee creature, and I could see how its shape would lend itself very well to polymer clay. So I made a start by conditioning a piece of white clay, and then I rolled out a thin sheet of black clay.

Cutting out the markings from clay for my wee animals is a bit like cutting out a pattern for making clothes. From the photographs, I try and work out how the markings will look when laid out in two dimensions - it can be quite taxing sometimes, and I have (rather disturbingly) been known to draw out an aerial shot of how the animal would look if skinned! I always to make the markings in a single piece, rather than join together sections of clay. This makes for a much cleaner, smoother finish.
Wee Spiderpig again

For Wee Spiderpig's ears, I used the Super Sculpey beige clay which I use for my cat noses (I also used it for Dr Mole's paws). I then added a thin layer of black clay to the shape, leaving a portion of the pale clay showing. I used the same beige clay for the nose as well.

Then I was faced with the 'feet or no feet' conundrum. From my experience of guinea pigs (and I did own one about 20 years ago - Barney was his name, although 'Wheep Wheep Wheep' would have been more appropriate for the all the noise he made), they don't often show their feet, and so I decided to follow suit with Wee Spiderpig.

Wee Spiderpig measures approximately 6cm long.

Wee SpiderpigSpot the difference

Wee Silly and Wee Molly (b.17 February 2010)

Wee Silly and Wee Molly
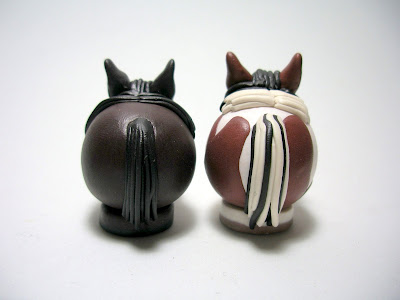
Carey, that lovely lady from Harrogate, asked for another couple of wee horses to add to her growing menagerie. Silhouette, whose stable name is Silly, and State Legacy, or Molly, belong to Carey's good friends and she wanted to surprise them with a wee gift.

Molly and SillyWee Molly and Wee Silly


Silly, a Skewbald, is Molly's mum. Molly is a bay, and both are just gorgeous horses. Molly has just had major surgery, so fingers crossed that she makes a full recovery.

I do enjoy making up piebalds (white with black markings) and skewbalds (white with any other colour marking). I've found that the coloured markings are often in similar places - large patches on the haunches, often with small patches at the belly, and also large patches on the chest. The mane and tail are often bi-coloured, as Silly's is.

To get the patches looking as natural as possible, the trick is to roll out a sheet of coloured clay very thinly, and then carefully tear out the required shape, bearing in mind that the clay will flatten out a bit when blended onto the body. The two colours in the mane are usually quite clearly defined, whereas the tale is often two-toned - Silly had a black core to her tail, with cream hair on the outside.

Thanks again to Carey for introducing me to these lovely horses!

The end

Wee Bessy, Wee Ginny and Wee Sox (b.17 February 2010)

Wee Bessy, Wee Ginny and Wee Sox
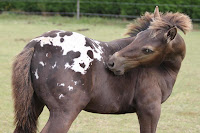
Back on 12 February, I received a message through Folksy from Beth, who wanted to know if I could make up three Wee Horses based on Bessy, Ginny and Sox. Bessy, a black filly, is jet black and very affectionate. Ginny is a bay mare who can read Beth like no other person can - Beth has been owned by Ginny for 16 years all told. And Sox - well, Sox is a buckskin appaloosa.

Sox at 9 months old
Wee Sox was a little more challenging than some others wee horse commissions I've done before. And I loved that! Not only was this a breed I hadn't made before, but Beth asked if I could do a future Wee Sox, based on what he'll look like when he grows into his adult coat.

Wee Sox
Appaloosa horses are best known as an American breed and have been featured in many Westerns over the years. They have a very distinctive coat and were bred to enhance the wonderful spotting pattern which covers the body in varying degrees. Although pictured with a chocolate coat and (to quote Beth) a Tina Turner mane, once he grows out of his foal coat, he will be more of a sandy colour with a black mane and tail. The black spots, which aren't clearly visible just now, will become more pronounced.

Wee Sox
So I set about creating the future Wee Sox! I started with creating a tan/sandy body by mixing up some clay, and then I worked on the black spots. These are quite wide-ranging over Sox's body, stretching from his hindquarters up to his neck, and they also come in a range of sizes. So I rolled out a very thin sheet of black clay and tore off tiny patches of black, attaching them randomly over the body. Then I gently rolled the body to blend the clay, and I repeated the process with white clay, although this was concentrated mainly on his flanks. So in fact, although it felt like it would be a complicated make, putting it altogether was quite straightforward.

There was no crystal ball-gazing when it came to making Wee Ginny and Wee Bessy - these are beautiful horses, and for Wee Ginny, it was more a case of making sure I mixed up the right shade and conker brown. To get the rich colour, I used the Fimo copper effect clay, which has stood me in great stead for wee horses. It brings a depth to the colour, as well as a great sheen - it's one of my favourite Fimo clays.

GinnyBessy


For all three wee horses, I placed their manes so that they were lying on their right. Rather than just lay strands of extruded clay flush against the body and neck, I first of all laid two strands of clay along the line of the neck, and then curled the strands of clay over it, which created a ridge where the neck would be. I think the effect works pretty well.

Thanks again to Beth for commissioning these three gorgeous wee horses - she was delighted with how they turned out, and I'm looking forward to finding out whether the real Sox will bear any resemblance to Wee Sox in the future!

The end

Wee Niko (b.14 February 2010)

Wee Niko
Wee Dogs have now arrived at Quernus Crafts! For several months, I've been asked whether I do dogs as well as cats and horses. I have been playing around with designs for them for a while, and at last I have found my canine voice (as 'twer).

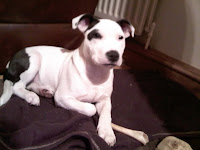
Niko, a very cute puppy
Wee Niko came into existence at the request of Laura, who was the recipient of Wee Harvey, a gift from her friend Kathy. Laura was thrilled with Wee Harvey, and wanted to know if I could make up a dog as well. (She also wanted to know if I could make up a guineapig, but more on that story later.)

Wee Niko with a hint of backside
The photos Laura sent through to me were just so cute, that I really had no excuse to just get on and make a Wee Niko. After experimenting with different shapes, I found that the dog shape wanted to be more like a right-angled triangle shape than my standard cat shape. In other words, my dogs needed a backside!

Wee Niko is made from one piece of clay, with only the ears, paws and tail added separately. I did experiment with shaping the head separately and attaching it to the body, but it just didn't look right. If the clay is well-conditioned, it's relatively easy to shape it into a dog nose and forehead, but it's easy to pinch too much and lose the definition needed for the muzzle.

Wee Niko has relatively few markings - I tore out a patch of thinly rolled black clay for his eye, and a patch for his backside. His ears are black with white tips, so I first of all cut out two black ears from a sheet of clay slightly thicker sheet than normal, and then two smaller white triangles for the tips. I cut the tips off the black ears and replaced them with the white tips, and then rolled them through the next setting on the pasta machine to bind the pieces together. This was particularly important for Wee Niko because his ears flop over in a very fetching manner.

For Wee Niko's tail, I cut a short length of thick copper wire and used this as an armature to strengthen the join between the tail and the body.

Wee Niko stands 4cm tall. I'm really pleased with my first foragings into Wee Dogland - watch this space for many more!

The End!

Dr Mole (b.14 February 2010)

Dr Mole
Dr Mole came into being as a result of an email through Folksy from Eloise, a lovely girl who had previously bought a Wee Sheep and a Cozy Reindeer Cat to cheer up her friend.

Eloise's dad has just heroically completed 30 years as a GP, and she wanted to mark the occasion. He does a skin cancer clinic, and Eloise wondered if it would be possible to do a mole (and just to be clear, we're talking about the cute, furry kind that digs up your garden). I hadn't made moles before, but straight away I could visualise how this wee character would look.

Dr Mole again
To get the right fur effect, I played around with the Starry Night cane technique and took it several steps further than I had before. I roughly chopped up black and grey clay and then whizzed it up in the blender (one of my best purchases!) Once it was finely chopped, I pressed the clay pieces back together and rolled them through the pasta machine. I kept cutting the sheet in half, stacking the halves on top of each other, and rolling it through again. I did this more often than I have done before, and the resulting cane was full of very small, thin, fine strands of the different clay colours.

And I didn't stop there! Once I had stacked the cut slabs into a cane, I then reduced the cane, cut it into four equal lengths and stacked them back together again. I then reduced this cane down again by stretching and pressing the square cane, and cut that cane into four equal lengths, repeating the process. This gave a even finer cane of small fine strands of clay, and gave a much more realistic fur effect than I've achieved before.

Guess who!
Once I had made by the fur cane, I covered a ball of clay with thin slices taken from the cane, and then rolled the ball gently in my hands to blend the slices together. I was careful not to blend the clay too much, or the fine fur effect would have been lost. (As it is, it's quite difficult to see on these photos, but take it from me - it definitely looks like fur close up!)

The mole shape itself came very naturally - it's such a lovely shape to make! - and I cut the hands and feet from Super Sculpey beige clay, which has a wonderful flesh tone to it. (I use it for cat noses too.) 'Dressing' Dr Mole was fun too - the stethoscope was made out of silver and black clay, and the doctor's bag out of brown clay. And I made the glasses by wrapping some thinnish wire on round plyers (that was a little trickier). And overall, I love the effect - he's one of my favourite characters, and Wee Moles will definitely join the Quernus ranks!

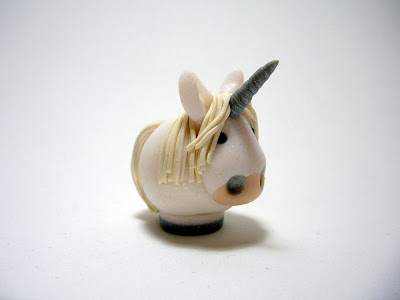
Wee Unicorn (b.8 February 2010)

Wee Unicorn
Wee Unicorn was commissioned by Kate, aka Glamourpuss, for her birthday on 3 March - HAPPY BIRTHDAY KATE!!

Based on the wee horse design, Wee Unicorn is made from glitter white Fimo, from the special effect range. It's the same clay out of whichc I made the eponymous Glamourpuss, and Kate suggested I use this for the unicorn.

For the horn, I used a silver clay. All metallic clays have an interesting property called the 'mica shift' effect. Metallic clays have mica added to them, and when the clay is conditioned, the mica gets re-aligned. This can lead to a 'streaking' effect, where the mica particles aren't aligned, but by continuing to condition the clay by rolling it out in the same direction, these streaks can be removed as the particles realign with each other.

I wanted to use the mica shift effect to make the twists in the unicorn's horn. I rolled out a thin snake of clay, making it pointy at one end, and then twisted it. This caused the mica particles to spiral, forming lines in the clay. Simples! To attach the horn to the head, and to add extra strength, I cut a small length of thick wire to use as an armature, and finished the join with some liquid polymer clay.

Wee Unicorn measures just over 3cm from nose to tail, and 4cm to the tip of his horn. And I'm so fond of him that I think he may be the latest addition to the Wee Beasties range.

The End

Wee Pandora (b.4 February 2010)

Wee Pandora

Well, would you believe it - another Wee Horse! Meet Pandora, the feisty bay mare commissioned by Helen through the website at the end of January. Thanks to Helen for letting me post a picture of her beautiful horse.

Pandora
I tried a new technique with Wee Pandora. Her coat is fairly uniform dark brown, apart from one white sock, a white blotch on her withers and a white star and a smattering of a blaze. You can see how her face fades from dark brown to tan, and I wanted to find out the best way to achieve this effect.

First of all, I made up the dark brown body and head by blending chocolate brown with black. Then I took a small amount of this clay and made a Skinner blend with some tan clay. This created a lovely blend between the two colours, and I rolled the resultant sheet out very thinly using the pasta machine.
Wee Pandora

I had already shaped the head using the dark brown clay, and I used the thin Skinner sheet as a veneer, placing it carefully over the head so that the blended part was near the bottom of the head. I carefully cut out the shape of the head from the Skinner sheet and rolled it onto the head, being careful not to trap any air bubbles.

I do love using the Skinner blend technique on some of the wee creatures I make. The effects are great - I am particularly fond of Wee Donk. However, it is quite a time-consuming method, as not only must the two or more colours be rolled some 20 times through the pasta machine, but the clay gets wider with each pass, so I've also got to reshape the clay back into a rectangle after each pass so that the clay continues to be blended correctly. And once I have a flat sheet of clay, there's the question of shaping it into something three dimensional. It's not so bad when I use the veneer technique, as I did for Wee Pandora, but for three dimensional shapes, like Wee Donk, I need to roll the sheet into a plug, and then shape it from there, doing my best to keep the blended area as intact as possible.

It's so great working out ways of creating the effects I want when making up these wee creatures. Polymer clay is truly a wonderful medium to work with.

The End

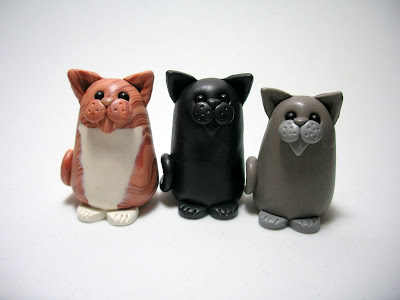
Timmie, Oscar and Hamish (b.3 February 2010)

Wee Timmie, Wee Oscar and Wee Hamish
That lovely lady from Harrogate, Carey, also wanted to have a reminder of her much-loved cats. Here we have Wee Timmie Tiptoes, Wee Oscar (who is sadly no longer with us) and Wee Hamish McTavish.

Oscar
Working from photographs, Wee Oscar was the easiest to make as he was a black cat with no markings. He was a little bigger than Hamish McTavish, but a little smaller than Timmie Tiptoes, so it was important to get the relative sizes right.

Hamish McTavish
Wee Hamish was a little more involved as I had to mix up just the right colours of clay. Although he is ostensibly grey/blue, if you look closely, there is also a suggestion of brown in there. I started with the blue/grey mixture, which I made by mixing black and white with a hint of blue, and then made a separate mixture of copper with brown and beige. By mixing these two batches together, I arrived at a subtle blend of slate grey/blue with hints of brown (you can just about make it out in the last photo). His chops and paws are a little paler than his body.

Timmie Tiptoes
Timmie Tiptoes is a luxurious ginger cat with a beautiful white tummy. I mixed up a number of colours to achieve the ginger stripes (suprisingly, there is no orange in this ginger cat), and then rolled out a very thin sheet of white clay for the belly fur. I cut out a rough triangular shape and then carefully blended this to Wee Timmie's body, smoothing out the edges to make them blend more with the body fur. I love this picture of him stretching out in the sun!

Thanks again to Carey for the chance to get to know these beautiful cats!

The End