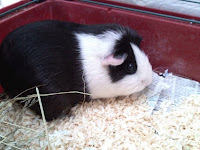
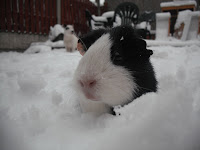
I had never made up a guinea pig before, but that's never stopped me! I do love creating a new wee creature, and I could see how its shape would lend itself very well to polymer clay. So I made a start by conditioning a piece of white clay, and then I rolled out a thin sheet of black clay.
Cutting out the markings from clay for my wee animals is a bit like cutting out a pattern for making clothes. From the photographs, I try and work out how the markings will look when laid out in two dimensions - it can be quite taxing sometimes, and I have (rather disturbingly) been known to draw out an aerial shot of how the animal would look if skinned! I always to make the markings in a single piece, rather than join together sections of clay. This makes for a much cleaner, smoother finish.
Cutting out the markings from clay for my wee animals is a bit like cutting out a pattern for making clothes. From the photographs, I try and work out how the markings will look when laid out in two dimensions - it can be quite taxing sometimes, and I have (rather disturbingly) been known to draw out an aerial shot of how the animal would look if skinned! I always to make the markings in a single piece, rather than join together sections of clay. This makes for a much cleaner, smoother finish.
For Wee Spiderpig's ears, I used the Super Sculpey beige clay which I use for my cat noses (I also used it for Dr Mole's paws). I then added a thin layer of black clay to the shape, leaving a portion of the pale clay showing. I used the same beige clay for the nose as well.
Then I was faced with the 'feet or no feet' conundrum. From my experience of guinea pigs (and I did own one about 20 years ago - Barney was his name, although 'Wheep Wheep Wheep' would have been more appropriate for the all the noise he made), they don't often show their feet, and so I decided to follow suit with Wee Spiderpig.
Wee Spiderpig measures approximately 6cm long.


No comments:
Post a Comment