*THIS BLOG IS NO LONGER UPDATED*

My new website can be found at http://www.quernuscrafts.co.uk/

The Happy Couple Part 2 (b.30 April 2010)

Hiking Cats
The second part of the commission for wedding cake toppers was for a pair of hillwalking cats, the bride and groom being keen hikers. And the exciting part of this was that these cats would be next to a tent created by one of the animators from Nick Park's team (he of the supremely wonderful Wallace and Gromit, Shaun the Sheep, et al)! OK, so I wouldn't actually get to meet them, but at least my wee cats would be in close proximity to Greatness - to say I was chuffed was a slight understatement!


The brief here was for boy cat to be brown, and the girl cat to be white. I used glitter white for the latter, as it has a softer appearance than ordinary white clay. I had lots of fun coming up with the accessories for them - from woolly walking socks (made from slices of cane), to walking poles (cocktail sticks painted black with clay handles, discs and straps), to rucksacks! The leather boots even have laces :)


I wanted the rucksacks to be as realistic as possible, so I hauled our rucksack out of the cupboard for a guide. I'm particularly fond of the hand at the top, and the way the 'elasticated' pouch at the front isn't flush with the rest of the rucksack. The piping around the edges has helped to I imagine he's got a rather battered Mars Bar in there for when he gets peckish!

I love the girly rucksack - the white piping helps to give if that 'high street' look, and I get the impression that she's not really a serious hiker :) But then, with a Nick Park-designed tent, who am I to say?!


Living happily ever after in a Nick Park tent!!

The Happy Couple Part 1 (b.30 April 2010)


A former colleague of mine from work asked me a few months ago if I could make up a wedding cake topper for her son's wedding. In fact, she wanted two couples - one for the formal cake, and another couple for a second cake - more on that story later!

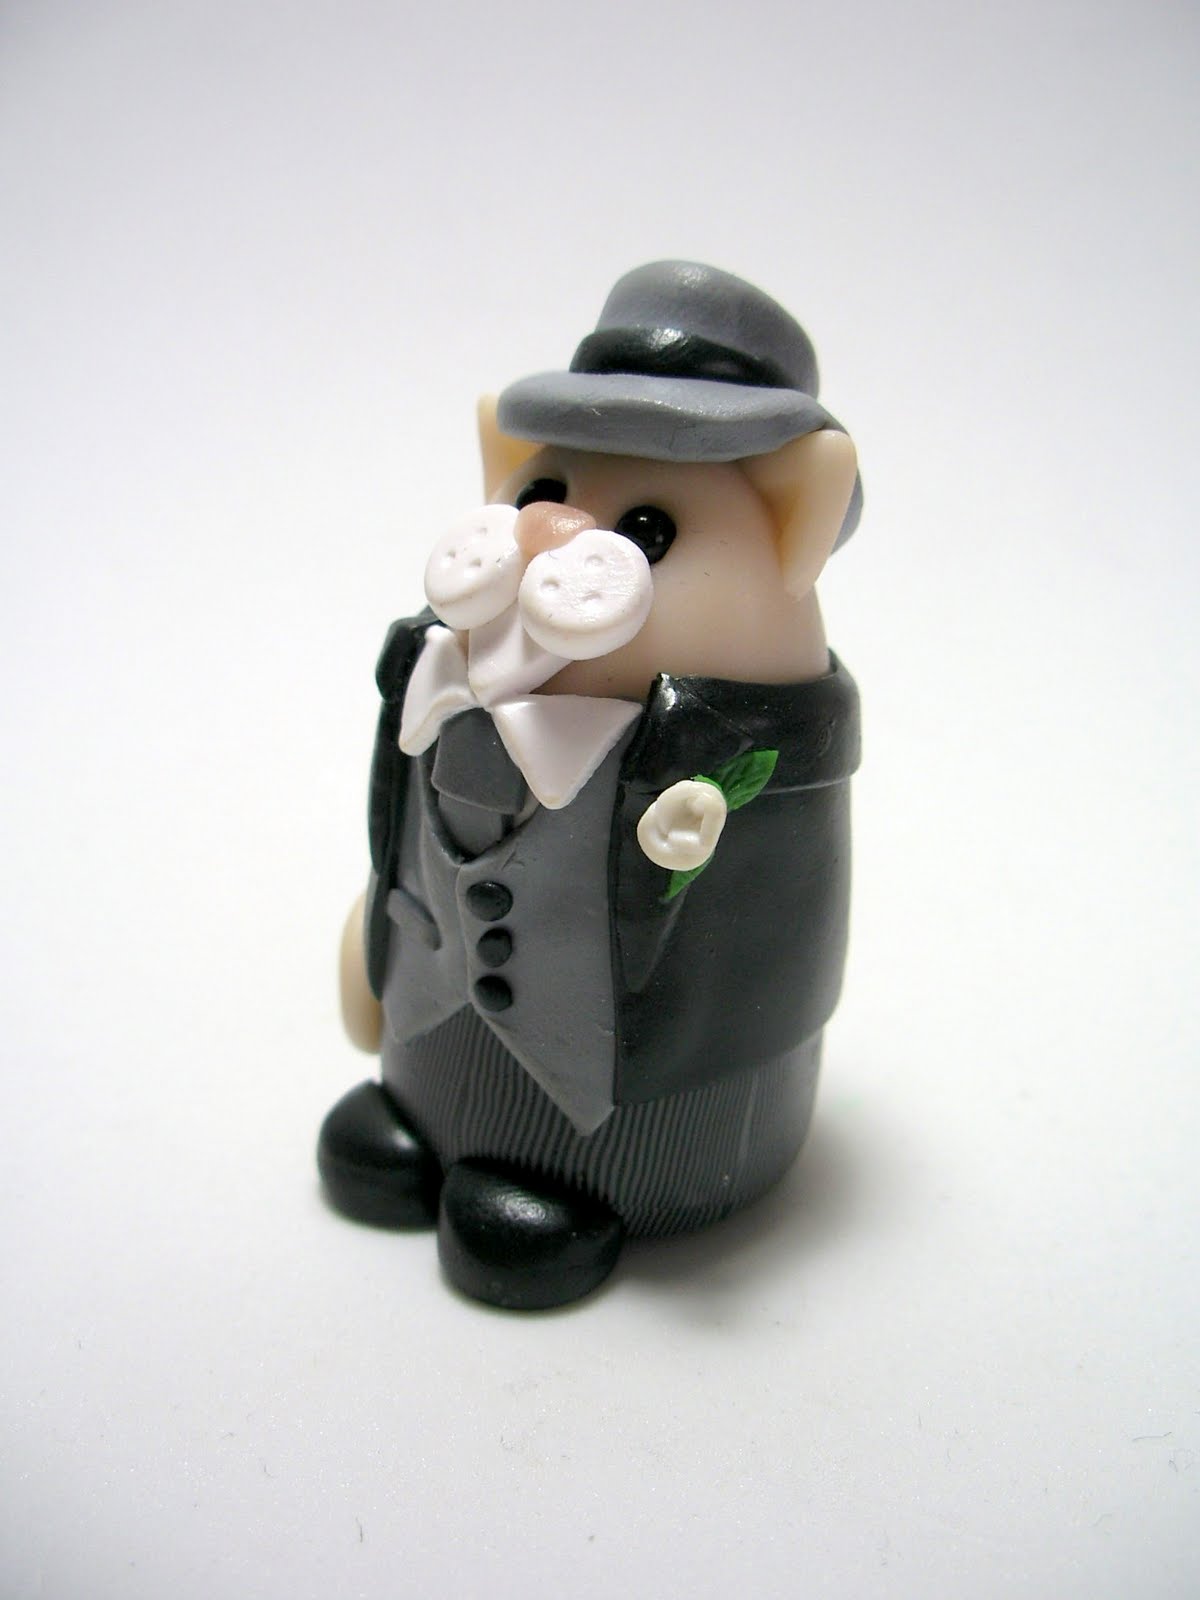
The brief was for flesh-coloured cats, an ivory dress and purple/lilac flowers and lilies for the bride, and a morning suit for the groom. Oh, and they had to be exactly 4.5cm tall. No more, no less. Well alrighty then!

I made the groom up first, and went for as much detail as possible. From the stripey trousers (don't you just love pasta machines?!) to his waistcoat buttons and a cute wee button hole. We had a bit of a 'hat-on-hat-off' dilemma, as the top hat took him a few millimetres above the required height, but I'm glad to say we managed to resolve that without too many tears.

I had so much fun making up the bride! From her wee ivory shoes, which have a purple seed bead as decoration, to the bouquet of white lilies and purple flowers. She also has a veil - I shaped some thick silver wire into a semi-circle and threaded on a small square of netting. I added some seed beads to either side, and then shaped the ends of the tiara to create a front decoration. It was fiddly work, but I love the effect! I secured the tiara and veil to the cat using liquid polymer clay.


For the back of the wedding dress, I created a confection of loops from a thin strip of ivory clay, and of course, the cats had to have their tails curling towards each other :)

And they lived happily ever after

Police Mole (b.14 April 2010)

Moleson of Dock Green

'ello, 'ello 'ello, what's all this then? This is Police Mole, that's what! Police Mole came about as a commission request through the website from Laura, a friend of Eloise, who had seen Dr Mole.

I spent quite a bit of time researching the shape of the helmet, and making sure it was as accurate as possible. Ditto the shield on the front, which I made up with metallic silver clay. For the truncheon, I used brown clay with a wire armature inside to keep it strong, and of course it had to have a wrist strap :)


Evenin' all!


Star Wars Cats (b.7-11 April 2010)

May the Purr be with you

Thought it was time that I got round to writing about my second batch of Star Wars Cats - and here they are! These came about through a message (or convo, as I believe they're called) on Etsy - a lovely American lass wanted to commission three new characters to add to their quirky Star Wars collection.

As you can see, the request came in for an R2D2 Cat, a Princess Leia Slave Girl Cat, and a Han Solo in Carbonite Cat. I could see how the first two would work straight away - R2D2 must have feline blood in him somewhere! - but I needed to give some thought to Han Solo.

The side of R2D2 you never get to see

I tackled R2D2 Cat first, and I went for a look that was as close to the original as possible (excepting the ears and tail, of course). It was actually quite hard to find a picture of R2D2 from behind, so I ended up watching one of the films - ah, the sacrifices I make for my art :) Turns out, all the fun stuff happens on his front, but at least I'm happy that the wee mite is a pretty good representation of the real thing. I even managed to put the orange rubber tubing on his feet :)

Princess Leia Cat

Next up was Princess Leia Slave Girl Cat. Now, I had some misgivings about this one. The costume is positively indecent! Couldn't have one of my cats letting it all hang out, even if it was for a good cause! But in the end, I overcame my qualms and got on with it. Again, I went for detail and took sketches of the bikini design. I used thinly extruded gold clay to form the pattern and a thin sheet of deep red clay for the fabric. It felt a little strange to be using a flesh-coloured clay, but I think the overall effect works out quite well. I even plaited strands of extruded brown clay for the hair. Now that's dedication.

Can you guess what it is yet?

And then came the fun part! Now, I had given quite a lot of thought as to how I should embed the Han Solo Cat - resin? clay? I wasn't sure, but I picked up a plastic mold when I was last in Manchester. And then I decided to just go for the simplest option - plaster of Paris.

Before I got down to all that, I made up Han Solo Cat himself. I used scrap clay for this and gave him arms with outward facing paws (a precursor to my recent Cats With Arms range!) I also dressed him with an open necked shirt and trousers. I baked him first, and when he was cool, I placed him in the bottom of the mold and had to prop him up with some wedges of clay so that the front of him would poke out of the clay. That was actually quite a tricky part because he kept rolling around in the bottom of the mold. (I resorted to Blutack in the end.)

Which version do you prefer?Spot the difference
I've never done plaster casts before, and I can tell you now that it's messy stuff. Still, I managed to get it to the right consistency, and then came the tricky part of pouring the plaster into the mold whilst keeping the cat in the right place. Once I'd poured the plaster in, I let it dry for about 30 mins, and when it was tacky I used a small ball of rolled up kitchen foil to mark the top of it. I also 'painted' a bit of plaster over the front of the cat so that none of the original clay showed through. Then came the tedious bit - waiting for him to dry. It took a full 3 days, despite me sitting him on the window ledge (it was quite sunny in April), and tucking him under the radiator. Still, he eventually dried out, and then I could paint him.

I put an coat of black acrylic paint on, and then applied an antique wax coat in a gunmetal grey. And do you know what? I'm really, really pleased with the way he turned out!

The Snail Emporium (8 July 2010)

The Snail Emporium on Folksy
Well, I guess it had to happen. I have opened a new shop on Folksy devoted to Snails, so I am delighted to unveil......The Snail Emporium!

Snail by Kirsten aged 5

I had a huge amount of fun designing the banner for this new shop - I used Serif PagePlus (my DTP programme that I downloaded free a couple of years ago) to draw the snail freehand - luckily, the program managed to convert my spiderly scrawl into something approximating my design. There then followed about an hour of colouring in on Paint. I've used a font called Farewell which I thought was suitably snail-like, and of course, there had to be a snail trail in there too!

Some may say that a shop entirely devoted to gastropods is just a bit too specialised. But no, says I. There's always a time in your life when you need a snail. A cute one. One that doesn't eat your lettuces. And so now you know where to find them :) They all have names and stories, and they all come with a signed certificate. Can't say fairer than that.

So if you know anyone who is in need of a cute snail, send them to The Snail Emporium. Plenty more Snails will be appearing soon - watch this space! And as always, if you have a particular request for a Snail, just get in touch - there are infinite mollusc options available :)

They never sit still for photos...